Is Transmission Repair Replacement Worth It

Transmission Failure: 7 Signs That your Transmission may be Failing

Your car’s automatic transmission is the behind-the-scenes workhorse of your engine, constantly shifting up and down through your gears to smoothly and silently transfer power to your wheels. When it works correctly, you don’t notice it—and that’s the whole point. However, the longer your transmission is in service, the more susceptible it could be to problems.

Sometimes, the issue is inexpensively fixed, but if left unchecked, you could find yourself in need of a full transmission overhaul, which can be an expensive and technical repair job. It’s worth knowing some early signs of a potential transmission failure, so you can catch developing problems before it’s too late.

7 Early Signs of Potential Transmission Failure

Transmission Warning Light

While the transmission warning light turning on may sound obvious, a surprising number of drivers will ignore their dashboard indicator lights. Some models have a specific transmission warning light, while others will have a general “check engine” light that can signal early transmission failure. In either case, you should take your car to a repair shop to check up on those warning lights as soon as they pop up.

Bumping Noises While in Neutral

You’d think that there wouldn’t be anything to look out for while your transmission is in neutral since your vehicle is not in motion. If you are hearing bumping noises in neutral, this might indicate that the transmission fluid is low or in need of replacement. Follow the instructions in your owner’s manual to test the dipstick under the hood to make sure the level is right and the fluid is still bright red and sweet-smelling (and not dark brown and burnt-smelling).

Noises in neutral could also indicate a mechanical problem, like a worn idler gear or work bearings. If a top off of your transmission fluid–follow the instructions in your owner’s manual–doesn’t resolve the problem, you should visit your mechanic to have them take a look.

Leaking Transmission Fluid

Automatic transmissions are closed systems. Unlike your engine’s motor oil, there is no reason why a transmission should leak or burn up its fluid. If you notice a puddle of bright red or dark brown fluid under the center of the car, that could be a sign of impending transmission failure. You should have a mechanic track down the source of the leak.

Whining Noises

You need to keep your ears open to notice this warning sign. When a transmission is starting to experience distress, it will sometimes start to emit a whining, whirring, humming or even a slight buzzing sound when in use. Often these noises are intermittent at first, but, if you don’t get them checked, they will happen more often over time and increase the risk of serious damage.

Uneven Gear Shifting

This is another warning sign that occurs when you’re out on the road. A properly functioning automatic transmission will shift almost imperceptibly between gears. The sensors are designed to transfer power as smoothly and efficiently as possible. However, if your transmission is having problems, you may start to feel a kind of shimmy or shudder when it attempts to shift from one gear to the next. That sensation can be one of the early signs of transmission failure.

Transmission Hesitation

This warning sign feels less like a stumble or a stutter during shifting, and more like an annoying pause before the next gear engages. If your automatic transmission starts hesitating between gears, it’s going to feel like something is off. You’ll want to have a mechanic examine the system. Not being able to rely on your transmission to give you more power when you need it can be a real safety hazard, especially in highway driving conditions.

Slipping Gears

If a car starts to slip gears, this is a clear and present danger that needs to be examined by a mechanic as soon as possible. When a car spontaneously slips out of one gear while driving, popping down to a lower gear, it’s time to get the car examined pronto.


Here are a few signs of transmission problems to consider:

  • If you notice that your car is dripping a red fluid, that is most likely transmission fluid. Check on the ground where your car is normally parked. If you find that you have more than a few small drops, you may need transmission repair in a hurry. If your fluid is low, you can add transmission fluid to your car in order to protect it from damage while you drive it to the auto mechanic.
  • When you are driving, the shifting between gears in an automatic transmission car should operate almost silently and imperceptibly. If you are having problems with your transmission, you may notice that there are vibrations or hesitancy when shifting through different gears as you drive. An auto mechanic with complete car care service expertise will be able to advise you about the problem and determine what type of transmission repair can get you back on the road.
  • When your transmission doesn’t have enough fluid, you may experience it stalling at red lights or stop signs. Though it should start right back up, taking your car to an auto shop for repair is key as your transmission lines may be leaking and may need to be replaced. Though still not a small repair, getting new transmission lines can make sure that your transmission is getting the fluid it needs to operate and can be less costly than an entirely new transmission or rebuild.
  • Fluid color.

Transmission fluid that has come from an overheated transmission isn’t generally red; it will appear dark brown or black as a result of being exposed to high temperatures. If you find that your transmission fluid isn’t maintaining its red color, then it is time to get your car in for repair.


Understanding Automatic Transmissions

The transmission transfers torque from the engine to the wheels to provide optimum power to negotiate various driving conditions. In a manual transmission, this is achieved when the driver selects the right gear depending on driving conditions.

Automatic transmissions select the right gear ratio without any driver intervention. Both manual and automatic transmissions give a fixed number of gear ratios. A CVT, on the other hand, gives a theoretically infinite number of gear ratios within a fixed range.

A manual transmission needs maintenance and it is checked during periodic service. It can also be easily repaired. But, automatics and CVTs are relatively maintenance free, at least according to most manufacturers.


Symptoms Of Transmission Problems

You know you have a transmission problem when your car starts behaving strangely. The gear shift becomes less smooth. Sometimes, the engine revs, but the car does not move forward. These symptoms may not be a problem initially, but they tend to get worse and after some time, become serious causes of concern.

When the symptoms become very acute, it pretty much spells the end of the transmission. Fixing the transmission in time can help prevent such problems and save you the huge cost of a new transmission. The trick is to prevent the transmission from getting to the point of no return.

Servicing An Automatic Transmission

Although saving the transmission is easier in the early stages, there is no harm in attempting a transmission fluid flush even at a later stage. In many cases, changing the transmission fluid can restore the performance of the transmission to a great extent even if the symptoms are acute. There is no guarantee, but it often works and is a good and inexpensive way to fix the issue.

A new transmission costs almost ten times the cost of flushing the transmission fluid. So, it makes sense to attempt the repair. It may not restore the transmission to its full performance, but some symptoms disappear and others become less dramatic. Maintaining the transmission in the early stages is much better than taking this gamble.


Servicing a CVT

Unlike a manual or an automatic gearbox, a CVT can theoretically offer infinite gear ratios within a range. This offers the right power for all types of driving conditions and great fuel economy.

Most manufacturers do not expect any maintenance on a CVT. That’s why, transmission fluid changes are usually absent from manufacturer-specified vehicle service schedules. A fluid change is not recommended as it is a “lifetime” fluid. What they don’t mention is that the life of the transmission is only about 120,000 km without maintenance and replacement is expensive.

Replacement costs are high due to the complex nature of the transmission. A new transmission could set you back by £3,000 to £6,000. A fluid change can significantly extend transmission life. CVT transmission fluid is relatively inexpensive and the entire job should cost only about £200. It is definitely the better option.

Why Should You Choose Custom Home Builder

Services At Builder Guider

our goal is to bridge the connection between the New Home Construction Community and local Brokers and agents to increase sales and Broker/Agent participation. We do this by providing instant and ongoing communication directly to the local Real Estate Community through multiple channels such as, E-Blasts, Social Media, and our Websites. By becoming the central portal for communication and information, we break the standard slow-twitch communication paradigm.

local BuilderGuides websites are designed to maximize local Builder and Developer brands and provide the immediate information that Brokers and Agents need to sell more new home construction.

All of the pages on our website are updated regularly in order to provide the Real Estate Community the most updated information including Inventory, Incentives, Events, Communities, Event Pictures, and Community Maps

The local Builder Guide is usually the first place Brokers and Agents review before they take clients out for new home community visits!

service makes it easy for you to sell new construction homes. Rather than searching through hundreds of homes, trying to find the right one for your clients, the right home comes to you!


A CUSTOM HOME BUILDING GUIDE

The time has come: you’ve decided to embark on the journey to building a new home! Whether you’re downsizing or upgrading, making room for new family members, or looking for something that better suits your style — this is an exciting new chapter in your life.

You probably have a lot of questions before you can get the ball rolling and break ground on your exciting new build. Let us help you answer them! No matter where you are in your building process, we’ve got the information you need: Know what you’re looking for?

Why Build a Custom Home?

Once you decide to move, the options for your new home are seemingly limitless: renting, buying a home, stick building a home, modular building a home, panel building a home, and many more. If you’ve decided a custom home is the right option for you, your options narrow down a bit and you are left with the choice of panel building, stick building, and certain types of modular building (depending on your customization considerations).

Aside from refining your options for creating your new home, custom builds offer the prospective homeowner a variety of other benefits:

Accommodation for accessibility concerns. When renting a home, or buying a previously constructed house it can be costly — and sometimes impossible — to adapt this structure for accessibility needs.

Unique architecture and design features. While renovations to existing homes are an option, for truly unique architecture and design tastes custom builds are the only way to go. Only panel building and stick building will give you endless customization options for aesthetics and build quality.

Personalized quality control. If you’re purchasing a home that was built decades ago, it can be impossible to know if the original build was up to the quality you desire in terms of what materials, methods, and labor were used.

Regional considerations are accounted for. When custom panel building a home, the engineering department can account for regional considerations such as snowfall amount to ensure performance and durability are optimized. Other factors, such as humidity, can affect the integrity of a home, and materials to optimize for this are accounted for as well.

Ability to build on almost any lot. If you found your dream lot in a rural setting, it can be difficult to build without a team who can give you a custom floor plan and has experience developing in that area. It’s important to find an experienced team that is backed by a reputable company. In some rural areas, it can be hard to pull together suppliers and architects since they are so few and far between. A good panelized building company can help streamline logistics.

What is Panelized Construction?

Panelized construction is a hybrid of modular and stick building. Walls are manufactured in 8 ft. segments with exterior sheathing installed and then shipped to the job site where they can be quickly assembled. Roof trusses and other pre-cut or prefabricated components are shipped to the job site as needed as well.


Mistakes to Avoid When Building a New Home

You’re going to build your dream home and you’ve thought it all through – or so you’ve thought. You know exactly what you need and want to have in your home, but have you thought about what you don’t want and what you don’t need? Have you really thought the whole thing through? You have given much thought and consideration to what will work for you, but have you taken the time to think about what won’t work?Poor planning and budgets that are too small can lead way to some wayward, inconvenient and disastrous mistakes.

When you plan on building a new home, you must look at the home from many angles. You must consider your current and future lifestyles. You need to take family planning into consideration – Will your family be expanding? Or will your children be leaving the nest?  Do you entertain often and host overnight guests regularly? Take your time and do your research both online and in person.

Be sure to take the time to meet with professionals in the industry. Poor design choices can make your home not only uncomfortable, but downright unhealthy. Architects, engineers and builders are all trained to help you make effective decisions. They will help guide you as to where you can save a few dollars and where you absolutely should not cut corners. If you aren’t building but are selling your home

Pay attention to your HVAC system.

Poor planning here can lead to issues with moisture and terrible mold growth. This can lend itself to great health concerns. Furthermore, careful attention should be given to the size of your units. Models that are too small will be underperforming and won’t cool and heat your home efficiently. You’ll come to regret this when your home is too cool in the wintertime and not cool enough during the hot summer months. Conversely those that are too large will utilize too much energy.

Poor Space Planning

Unless you have plans to build a very large home, space planning and design is crucial. Ample storage is necessary, but pay attention to where you place your storage space. Does the master bedroom really need an oversized walk-in closet when the space could potentially be added to your bedroom or master bath? Pay attention to where you place your closets. There should be one in each bedroom and in a main hallway. But too many and the storage space takes away from the living space


Guiding you to your new home

Homes can design and build your home to fit your specific needs and wants, whether it is on your lot, one of ours, or a lot that one of our highly trained real estate professionals can help you find.

Building Consultation

First we listen. The initial meeting is a time for you and a Homes representative to go over your wants and needs. Next, we will help you understand your options, as well as gather information and share some suggestions on locations, sites available, floor plans, and general pricing.

Proposal Meeting

Based on the Building Consultation, this meeting is to review the proposed package which includes a house plan, home site, location, and initial price

Site Plan Meeting

During the site plan meeting, you will be meeting our project manager. This meeting’s purpose is to determine house placement, and go over any other details regarding the excavation and digging

Purchase Agreement

Once you and Homes have generally agreed upon a house plan, location, and base price, the next step is to write the offer to purchase. A builder deposit will be required to finalize this agreement.


Consumer Code for Home Builders

The Consumer Code for Home Builders (the Code) is an industry-led scheme which gives protection and rights to the purchasers of new homes, ensuring that new home buyers are treated fairly and are fully informed about their purchase before and after they sign the contract.

the other home warranty bodies who support the scheme, agree to comply with the Code requirements. The Code benefits both home builders and buyers by aiming to improve on the already high levels of customer satisfaction and therefore enhancing the reputation of the industry.

Code approved by Chartered Trading Standards Institute

The Consumer Code is now a fully approved code sponsor after completing the CTSI Consumer Codes Approval Scheme (CCAS) process. Home building is one of the largest industries ever covered by a CTSI approved Code, and has undergone particularly robust scrutiny as a result.

Being a CTSI code sponsor gives home buyers added confidence that the Code is robust and meets the high expectations set by CTSI. In order to secure CTSI approval, the Code was independently examined by experienced auditors who were looking for evidence that the Code can influence and raise standards across its membership; monitor compliance and has appropriate measures to respond where non-compliance is found; that there is access to an independent dispute resolution scheme for any complaints raised with a member that isn’t resolved; and that the Code can keep pace with changing market and industry practices and expectations

How To Film A Multi Camera Keynote Address Using Just One Video Camera Operator

Cameraman reveals his true brand

It’s one of life’s more reliable axioms that if a man has to tell you he’s a good dude, there’s a fair chance he is actually an insufferable gobshite.

who prides himself on seeing things the rest of us simply cannot grasp — took issue with a camera operator for, well, operating a camera. On the 7th hole, the surly pseudoscientist hit a mediocre greenside bunker shot and angrily threw his club — manufactured by Cobra and available from all good stockists — into the sand. After marking his ball —brought to you by Bridgestone — he had a testy exchange with a camera operator who captured this, before storming to the 8th tee in a pair of stylish Puma shoes.

optimism in thinking that being shown acting like a jerk would hurt his image rather than merely solidify it.

The world No. 10 — a ranking he has reached thanks in part to his Flight Scope — was sufficiently upset to keep talking after the round without bothering to note the hour on his Rolex timepiece. “For that to damage our brand like that, that’s not cool in the way we act because if you actually meet me in person, I’m not too bad of a dude, I don’t think,” he said.

Just a few weeks ago, he posted to Instagram an intimate, 15-minute movie in which a camera caressed him as he ambled from his bedroom to breakfast, lingered over his form during workouts, and gazed adoringly at him as he cruised the neighborhood in his convertible. It was a love letter to himself, part Narcissus, part Pee-wee Herman, set in a hall of mirrors.


How to become a Cameraman

I have been sent a few emails recently about getting started in television, and how to become a TV Cameraman. Before starting down this road it is worth asking yourself the question “Do I really want to become a cameraman?” You are about to embark on a career that could last the rest of your working life, so it is worth thinking about this one.   If you are wondering how much money cameramen make you may also be interest in this.

Firstly, here are a few pluses to being a cameraman:

1) You get to travel to interesting places.

2) You get to meet interesting people.

3) There is a creative element to the job, which can be very rewarding.

4) It is very varied, one day you could be filming a sunset in the Caribbean, the next you could be a in London sewer. (I am speaking from experience here).

Secondly, here are a few negatives:

1) Travelling can become excessive, and it is often beyond your control. If you are a freelancer it is very difficult to turn down work, as you get older and have a husband/wife/kids, you may not be as keen to spend months of the year abroad.

2) All most all cameramen are freelancers, I personally love this lifestyle, but it isn’t for everyone. At the first sign of a recession or slow-down in the economy, the first thing that happens is companies pull back on advertising spend, this in turn means broadcasters choose to spend less and commission less programmes and, therefore, work for a cameraman will drop off. For some people this is fine, they can spend the free time polishing their lenses or something, for others, it can be very stressful.

3) The freelance lifestyle is somewhat erratic. Here is a conversation that frequently goes on between all cameramen or women and their wives or husbands:

Spouse: “Are you around next weekend, I want to have a BBQ”

Cameraman: “Don’t know, might be in Cambodia.”

Spouse: “When will you know?”

Cameraman “Don’t know.”

This sounds ridiculous to people outside television, but if you work in TV it is totally normal.  Production companies are often waiting for confirmation of talent/flights/budget/people etc etc, it is a nightmare juggling act that the production managers have to deal with. Not every shoot is like this, but it is in no way unusual. For the cameraman, this means planning things in the future can be tricky, and it is something that effects not just you, but your friends and family.


Tips for Directing Great Live Video

Directing a live video production isn’t for the faint of heart. It requires the ability to deliver clear direction, quick feedback, and maintain a steady emotional equilibrium when dealing with others. Following are simple tips from a seasoned church production director that can help.

Use consistent terminology

Few things are more confusing for a camera operator than to hear a mix of different words, or to hear certain words used interchangeably.

Understand some camera basics

While it’s not a requirement that a good director have previously been a camera operator, it can certainly help. Often, if an op has a problem during a service or show, the first line of defense is to get on intercom and tell the director what’s happening

Take notes during rehearsal

The director, not the camera ops, is ultimately responsible for the quality of the camera cut. After all, the cameras are simply moving at the discretion of the director, who bears the responsibility for telling the story of what’s happening on stage.

Mentally plan the transitions

Nothing makes or breaks a service more so than transitions. A smooth one can make things feel like they’re all flowing together cohesively, while a poor one makes you feel like you just jolted to a halt as in a car accident.


Video Production Tips

If you work in the video production world, it’s very likely that at some point a client will hire your camera crew (or just a videographer) to capture video of a speech or presentation. Whether it’s for a medical conference, corporate event, keynote speech, short talk, or a live presentation, it doesn’t matter…the same applies to all: Preparation is everything. In other words, makes sure to get some pre-production work done before your camera team starts to film.

Pre-Production

For our production crew here in Vienna there’s never enough information the client can give us before any video shoot. Here are just a few points:

– Find out what kind of video the client wants. For instance, do they have examples of a style they’re looking for? In most cases the answer is yes.

– What’s the content of the presentation?

– Does the client want the speech / presentation filmed in its entirety? Or do they only need snippets? This determines how flexible the camera operator can be with the camera set-up.

– Will there be a screen/projector? And does this need to be incorporated into the final video?

– Location scouting! Make sure to scout the location beforehand and find out how big the room/stage is, where you can place the camera(s), is there be a PA system (sound board)? Will the speaker be holding a microphone? Wearing a wireless lav mic? Or will there be a microphone attached to the podium? Where are the power outlets, etc. You get the deal.

Audio

As with basically every corporate video shoot, recording high-quality audio can significantly differentiate an amateurish video from a professional production. If there’s a technician with a sound board on site, you can ask to get the audio feed sent directly to the videographer’s camera via an XLR cable. Another option would be to hand the technician an external recording device (Like a Zoom) so your video team has a copy of the audio file to synch later in the editing process.

Lighting

This can be tricky and might very well be out of your control depending on the event you and your camera team faces. Bigger conference centers usually have their own technical department that can/will modify the lighting on the speakers. However that’s not always the case and it could very well be that your video crew will find themselves filming talks and presentations in much smaller venues with bad lighting situations.

Don’t Film the Screen

Although what’s being projected on the screen might be necessary for the final video, don’t film it. Trying to expose for the screen and speaker at the same time will make your image look anything but professional. The cameraman is better off framing a tighter shot focused on the speaker (like a medium shot) and simply getting the presentation files from the speaker later in order to synch them in the editing process.


VIDEO RECORDING MEETINGS, EVENTS AND LECTURES

I don’t consider myself a video professional, but I’ve made a several budget educational videos, and recorded meetings and conferences.

So, you might expect me to be an enthusiast for video technology. In fact, I often urge caution, because making good video takes more skill and time and planning than audio. Good video kit is expensive, and often difficult to transport. Storing digital video can consume huge amounts of memory, and costs bandwidth to transmit; with both image and sound to kick into shape, the editing process is more complicated; and video technology and technical standards have been changing very fast. It’s been hard to keep up.

If video from an event will be no more than a speaker’s ‘talking head’ and some Powerpoint slides, I tend to suggest concentrating on a good quality audio recording. It’s cheaper, easier, and in the edit it’s so easy to improve a presentation by snipping out the ‘Ums’ and ‘Ers’… and you can’t do that as seamlessly in a video edit.

A technical revolution: video everywhere

Sensor chips for image capture came to consumer digital cameras and camcorders about 25 years ago. Since then, they have been attaining higher resolutions, better sensitivity to lower light levels, and have become cheap. What was once an exotic technology found only in space satellites is now in everybody’s smartphone! This revolution is boosted by ever more powerful video-signal processing chips, and the capacity and speed of solid-state memory, such as the near-ubiquitous SD memory card.

Ask: why are you doing this?

As in my audio-recording article, let’s start by examining possible purposesfor making video

How To Become A Professional Home Builder

What do custom home builders do?

Many analogies have been used to describe the professional builder: the conductor of an orchestra, the captain of a ship, even a general executing a military campaign. The point is that the builder is the one who must coordinate the innumerable players and products needed to transform a set of two-dimensional drawings into a finished home. The builder has to make sure that everything happens just when it’s supposed to, and that the end result is exactly what the clients envisioned.

Ideally, this responsibility begins well before the first shovel breaks ground. One advantage to choosing a builder early in the design process is that the builder can make sure the home can be built in the most efficient and cost-effective manner. Bringing on a builder at this early stage can yield significant cost savings.

Once the plans are complete, the builder has to work with local zoning and code authorities to secure the proper permits. Professional builders have a thorough understanding of building codes, as well as good working relationships with local authorities. This is another big plus to hiring a pro: the building department is likely to scrutinize more closely a permit application submitted by a homeowner, or even by a small building company, than one submitted by an established professional contractor with a reputation for solid management and quality work.

Professional builders also have close relationships with quality subcontractors. And because the builder is a source of ongoing work for those contractors, prices offered to the builder will likely be less than prices offered to anyone else.


Once the project is under way, the builder’s management skills really make a difference.

These skills include:

  • Keeping the job on schedule by ensuring that all workers and materials show up at exactly the right time. Construction timetables can change quite often, with causes that range from bad weather to late deliveries. The time and organization required for the builder to constantly adjust everyone’s schedules is something homeowners seldom see.
  • Overseeing the job to guarantee that all trades deliver quality work. The builder knows enough about each specific trade, and has a good enough relationship with each subcontractor, to make sure things get done right. For example, if it’s too cold to pour a concrete slab, the builder will have the knowledge and authority to put it on hold even if the concrete contractor is tempted to move ahead.
  • Solving and preventing problems. A new custom home is an extremely complex undertaking with a million things that can go wrong. Having a professional builder in charge of solving problems takes a lot of stress off the homeowners.
  • Completing the punch list at the end of the project. Everyone has heard stories of unprofessional contractors who left a job with a list of small things undone. The professional builder has the resources to make sure that everything is complete before the key is turned over.


Custom Home Builder Do

Building a custom home is a great way to bring your vision of a perfect home to life. A good builder will work to maximize timeliness, remain communicative, and ensure quality throughout the build. They’ll be your guide through each phase of the process.

Design

The custom home builder will work with you to coordinate costs and design your ideal home, inside and out. This will likely involve working with an architect, interior designer, and landscape specialists.

Pre-construction

One of the first steps is selecting location. You can bring your own lot to a builder, or hire a builder who will help you select the perfect neighborhood and lot on which to build. Either way, your builder is also responsible for determining your new home’s setbacks, or how far away from both the street and your neighbors’ homes your house will be built.

The next step is general permitting, all of which is your builder’s responsibility. They act as liaison with local government to ensure everything with your house and lot is up to code throughout the building process.

Construction

Your builder will sub-contract or coordinate with their in-house team to lay the foundation and install the framing, roofing, walls, siding, flooring, electric, heat, plumbing, and more. The local code department will search the building site throughout the process for code violations, but your builder should already be one step ahead to ensure you are a satisfied customer—and that everything is up to code before inspection.

In short, a good builder will oversee all the teams to ensure the house is completed according to the highest standard of quality as well as the agreed upon timeline and budget.

Post-construction

After construction is complete, your custom home builder will notify the appropriate city or municipal departments that the home is ready for its final inspection. They will clean the site, secure city inspections, and be ready to hand you the keys to your new custom home.


Production versus custom home builders: what’s the difference?

Here’s a breakdown of what to expect from each:

Production Builders

According to the National Association of Home Builders (NAHB), most production-based home builders:

  • Offer home and land as a package
  • Offer a range of house plans to choose from
  • Allow buyers to select their favorite style/design from a menu in several product categories
  • Build homes priced for first-time, move-up and luxury buyers

Custom Home Builders

As the name implies, the process of building a custom home is less scripted because there are no pre-defined choices or menus to choose from. With custom homes:

  • The home can be built on land you own or land that you acquire.
  • You can supply a floor plan or commission a set of floor plans to be drawn from scratch.
  • You can work with a separate architect and builder — or with a design-build company that manages both the architectural design and the construction process.
  • You’ll be more involved in the process and have the opportunity to make many decisions.
  • You can pick from nearly any product in a category — within your budget, of course – rather than selecting from a defined menu of choices.


Designing Your Custom Home

Rather than adapting to the layout of an existing home – this is an exciting opportunity to design a home to match your needs. You can create a space specific to the way you and your family live. All of the features – from the doorknobs and countertops to the type of heating and arrangement of rooms – are up to you. To know what to do, you must consider how you wish to use the space.  The questions and suggestions in this section should help you make your architectural program.

  • Determine the size your home should be
  • Are there any restrictions on the possible size of your home?
  • How many stories do you want your home to be?
  • What rooms do you need?
  • What aspects of your lifestyle do you want to be built into your home?
  • Consider the type of layout you want
  • What structural features do you want in each room?
  • Determine your design and style preferences
  • Are there any special features you want to be included? (fireplaces, heated floors, etc.)
  • Green design?

What Is Manual Therapy Chiropractor

What Makes A Good Chiropractor

Today we’re going to talk about going to a chiropractor and how to tell your out-of-town loved ones how to choose a good one on their own. Without your help even! We’re also going to talk about being the kind of chiropractor that your colleagues are happy to send their family to.

OK, we are back and you have found the Chiropractic Forward Podcast where we are making evidence-based chiropractic fun, profitable, and accessible while we make you and your patients better all the way around.

We’re the fun kind of research. We’re not the stuffy, high-brow kind of research oh no…. we’re talking about research over beers.  If you haven’t yet I have a few things you should do, like our facebook page, join our private facebook group and interact, and then go to chiropracticforward.com and check out the store link. Sign up for our weekly newsletter there too.

Now if you missed last week’s episode, we covered a lot of research. It was Episode 100 so make sure you don’t miss that info. I know there were some good solid knowledge nuggets found there within so make sure you’re up to date and not falling behind the rest. Keep up with the class, man!

On the personal end of things I cannot tell you what a trying and what an emotional week it’s been. These episodes are recorded a week or two ahead of time so you’ll note the time difference of when this happened and when it’s making its way live. On Saturday November 9th, my dad had a stroke. He got out of bed that morning and said he’s got a tall bed so he always has to sort of find his footing before he gets out and walks. He said on this day, he got out of bed and got out a bit awkward and fell.


ANTI-AGING TIPS FROM A CHIROPRACTOR

People have been obsessed with staying young for almost all of recorded history. As the medical profession finds ways to keep people living longer, the problems with aging are becoming more obvious. Back pains are a common ailment for adults, and age only makes the pain worse. In fact one of the images that first springs to mind about older people includes the person holding their back.

You may not be able to stop the passage of time, but you can slow the aging process through proper care of your back. All of the things that your mother and teachers tell you to do as a child are habits that you should adapt. By strengthening your back from an early age, you can reduce the likelihood of problems, or minimize the pain if you are injured. Even if you aren’t young anymore, there are things you can do to help your back feel younger.

START STRENGTHENING YOUR SPINE

If someone were to say that you are the backbone of a project or group, you know that means you are the main support. You are the spine of that project or group.

This shows just how the spine has come to be synonymous with support. Your spine is literally the support for your entire body. By strengthening it, you reduce the likelihood of suffering back pain. More importantly, you will ensure that your back can support you over the course of your life.

Here are some things you can do to focus on strengthening your spine and the muscles around it.

Do planks, not sit-ups or crunches. While these older exercises can help strengthen a back, doing them wrong will do far more damage. Planks are just as effective, and it helps build other muscles.

Work on your stomach muscles. One of the best ways to strengthen your spine is by not requiring it to be your only support. Strong muscles will provide support for your spine.

Avoid repetitive movements that put a strain on your back.

If you have to lift heavy objects, use a back brace to provide extra support.

Stand Up and stretch over the course of a workday. If you just stand and stretch your arms over your head once an hour, you are helping your entire body, including your eyes. The human body was not designed to sit for long periods of time, so give it some movement every hour.

Carry objects close to your body, including backpacks. This distributes the weight of the object over other body parts instead of straining the back and arms.

Wear comfortable, well-balanced shoes.

Avoid staring down at your phone or tablet. If you look around you now, there are probably people staring at their phones, their necks bending down. Over time, this will have an adverse effect, just like slouching.

Meditate to help you get accustomed to sitting properly and learning to think about your body more often.

THE THINGS YOU KNOW, YOU SHOULD DO REGULARLY

Those things that you’ve been ignoring for years are exactly what you need to do to have a healthier back. Yes, it will be annoying. It will definitely take you a while to get accustomed to many of the things that you have been ignoring most of your life.


What’s the Difference Between a Physical Therapist and a Chiropractor?

Many patients coming to physical therapy have at some point considered going to, or have been to, a chiropractor. Physical therapists and chiropractors often treat similar conditions and areas of the body, leading patients to wonder, “What’s the difference between a physical therapist and a chiropractor?” While chiropractors and physical therapists treat and even co-treat many of the same conditions, they both offer unique perspectives on the focus and methods to reach a positive outcome for clients. Below is a quick examination of the differences in training, focus, and treatment offered by chiropractors and physical therapists. Understanding what your healthcare provider can offer makes you a much more informed advocate for your own health!

Chiropractors:

Chiropractic means “to be done by hand,” which is an accurate representation of this field’s focus. Chiropractic care emphasizes diagnosis and treatment of mechanical disorders of the spine and joints, with a particular focus on how the joints can influence the nervous system and overall body alignment. The chiropractic field was first established in the 1890s with a focus on using spinal manipulation and joint adjustment to avoid reliance on other forms of medical intervention. This emphasis on use of more conservative methods of treatment rather than reliance on medication or more invasive procedures continues to be a primary focus of the chiropractic field and is one of the reasons it’s attractive to many patients! To become a chiropractor, a student must complete a Bachelor’s degree, attend an accredited chiropractic program and receive a Doctor of Chiropractic degree, and then pass a certification exam to be able to receive licensure. Depending on how recently they were licensed and their status, chiropractors in Oregon are required to complete anywhere from 6 to 20 hours of continuing education annually. The mission statement of the American Chiropractic Association is: “To inspire and empower our members to elevate the health and wellness of their communities,” and their vision statement is: “The American Chiropractic Association is leading a modern movement of chiropractic care based on higher standards and a focus on patient outcomes.”

Physical Therapists:

Physical therapy can mean something different to each patient because, similar to MDs, the field is split into many different medical specialties. In general, physical therapists embrace the description of “the movement specialists,” paying close attention to how the body moves and functions as a whole. Because of this, physical therapists perform both hands-on, “manual” therapy (which ranges from soft tissue work to adjustments or manipulations that you might receive from a chiropractor), as well as prescribe exercises and neuromuscular education to encourage independent healing and empowerment to self-manage symptoms. This field grew out of the many nurses who helped rehabilitate soldiers following World War I. This filled a gap in the medical field that gave individuals who would have been unable to walk or function independently a chance to lead a fulfilling life with the maximum amount of function. Currently, to become a physical therapist one must complete a Bachelor’s degree, attend an accredited physical therapy program and receive their Doctorate of Physical Therapy, and pass a licensing exam. Additionally, many physical therapists choose to specialize in a specific field, often going through residency programs or participating in fellowships to receive several years of additional training in a particular field. physical therapists are required to complete 24 hours of continuing education every 2 years. The mission statement of the American Physical Therapy Association is: “Building a community that advances the profession of physical therapy to improve the health of society,” and the vision statement is: “Transforming society by optimizing movement to improve the human experience.”

Being familiar with your health care providers and what they are able to offer is a great way to advocate for your own health! While both physical therapists and chiropractors offer an alternative to more invasive procedures, they also offer a wide variety of other healthcare options and interventions. Feel free to ask more about what your healthcare provider can do for you. You might be surprised!


HOW CHIROPRACTIC ADJUSTMENTS IMPROVE BODY FUNCTION

Everything that takes place in the body is regulated by the information contained in the brain and the nervous system. The brain is the control center of all bodily functions. The spinal cord and branching nerves send signals from the brain to control and coordinate the function of all the organs, tissues and systems. Nerves also send signals from the body back to the brain.

This relaying of electrical and chemical signals to and from the brain allows the body to function and adapt to everything that we do and experience.

All organ systems and processes in the body connect to the brain, including the:

Heart and blood vessels

Digestive system

Production of hormones

Skin and sensory perception

Immune system

Muscular and skeletal systems

Detoxification and elimination of waste

Reproductive system

Respiratory system

Regulation of body chemistry

The brain controls all that we see, hear, smell, taste, touch, and feel. It is also the center for our thoughts, emotions, and behavioral responses, both conscious and subconscious. The delicate brain and spinal cord are protected by bone. Pound for pound, bone is harder than cast iron or steel. In order for the body to be healthy, it must be able to adapt to internal and external forces.

The body can be subjected to experiences that may overwhelm its ability to fully adapt. These stressors impact the body and may create vertebral subluxations. Vertebral subluxations are disruptions in the motion and/or alignment of spinal bones with related irritation or obstruction of proper nerve function. Vertebral subluxations alter the ability of the brain and nervous system to properly control and coordinate the body, which results in decreased body function, adaptability, and vitality.


Back Pain: Can a Chiropractor Help?

Back pain is one of the most common-and debilitating-ailments people face. And finding the right pain relief is no easy feat: A paper in The Spine Journal likened choosing a treatment to relieve back pain to supermarket shopping, comparing the wide array of treatment choices to the vast inventory on grocery store shelves.

Getting your back on track

Modern chiropractic treatment is based on the assumption that back pain is caused by misalignment of the spine. Spinal manipulation involves physical pushing, pulling, and methodical repositioning of the head, shoulders, neck, back, or hips to help alleviate back pain.

Caveats to consider

Other treatments can also relieve back pain, from over-the-counter pain relievers such as ibuprofen (Advil, Motrin), to physical therapy, massage, or a combination of therapies. Research has found that spinal manipulation works about as well as anti-inflammatory and pain relief medications and other traditional interventions

Why consider chiropractic treatment?

According to the American Chiropractic Association (ACA), chiropractors treat not only back pain, but several other health conditions, including neck pain, headaches, and muscle, ligament, and joint injuries and disorders. Doctors of chiropractic (DCs) undergo extensive training to diagnose and treat musculoskeletal problems.

Chiropractors perform spinal manipulation by using their hands or a device to apply a small amount of force-or a more forceful thrust-to readjust the bones in the spine and neck. Spinal manipulation is typically most effective when combined with more traditional therapies to treat back pain, such as:

Heat and cold therapies

Massage

Relaxation techniques

Electrical stimulation or ultrasound

Exercise and stretching

Patient education

DUI Lawyer Training

Do Most DUI Cases Go To Trial?

Realistically, DUI cases sometimes do not go to trial often enough. Many different things can come up with DUIs. One of the things that we see a lot is any time it is a first time DUI, if the plea offer is to plead to the charge, you really do not have that much more to lose by going to trial. The potential is out there to receive a harsher penalty, but in reality many times that is not going to happen. The unfortunate thing is when it is a DUI case there are many issues involved. Often times the prosecutor may make an offer to a non-DUI resolution, and many clients want to try, and avoid the risk of a DUI trial. It is not very often that they go to trial, but we try to encourage cases that should go to trial go to trial.

Is It True That Many DUI Attorneys Avoid Taking A DUI Case To Trial?

Yes, many attorneys do not want to go to trial on DUI cases. We have seen this couple of different ways. Sometimes an attorney will offer a flat fee, and then they will include the trial in that flat fee. If the trial outcome is going to be the same thing that the plea agreement is, then you save time by not going to trial, which would essentially cost you more money as an attorney. We do not do that, we have a trial fee, which sometimes means that the client would want to avoid that payment, and would rather take the plea.

Most of them have are backed up by science statistics, which makes them a little bit difficult. Sometimes it is just an ego thing. Some attorneys may not want to go to trial and have to say that they lost a DUI trial, but that happens. You have to get over it, so that you can be better and win these trials the next time.


What Criteria Do You Consider When Deciding Whether Or Not To Take A DUI Case To Trial?

It depends on the legal issues. Some problems that are considered include physical control issues, meaning whether the state can prove that our client was actually driving the car. There is a litany of issues with the blood testing, and the different problems that can happen with that process. There is also the ability to cross-examine the officer on the different field sobriety tests if the client took those tests when the stop occurred.

Ultimately, it is always up to the client as to whether or not they are going to take up a plea offer or if they want to go to trial, but there are some factors that we do take into account. If the client has any other criminal history, and if they have a bad driving history, the state may try to offer a harsher penalty at trial. Again, if the plea offer is to plead to the charge, our general consensus is you might as well go to trial and fight. Problems come up at trial that you never can really prepare for and that is the thing we want to capitalize on.


Should Someone Go To Trial Simply Because They Did Not Like The Plea Offer?

Realistically, the client could decide whatever reason they wanted to go to trial. I have represented police officers, politicians and legislators and other people who just cannot have a conviction on their record, so even if they had a horrible case, they would want any chance or possibly to not have a conviction on their record.

During my career, I have handled at least 2 cases where I had told them it was not worth it to go to trial because I did not see the likelihood of wining and that I thought it was a waste of time and waste of money, but they still insisted, so we went to trial and then something went wrong during the trial for those two cases and they ended up walking free because the prosecutor had either made a mistake or else they did not show up.

The client would not have to explain their reasoning for why they wanted to go to trial, because it would be their constitutional right to go to trial. I would only be able to advise them with respect to my thoughts about them going to trial and what their options would be so they could make a fully informed decision on how they wanted to proceed. It would be perfectly fine if they wanted to go to trial and it would be perfectly fine if they wanted to take a plea agreement.


Do Most People Have A Clear Understanding Of What A DUI Trial Is All About?

Almost all clients come in with a misconception of what proving a drunk driving means. Most individuals assume if they have been stopped, arrested and charged, then they must be guilty and there is nothing they can do about it. That is the biggest mistake an individual can make. Every case has defenses. Every case requires the prosecution to prove their case beyond a reasonable doubt. Every case is worth fighting, whether or not the result of that fighting may be a reduced sentence or a trial. Nothing can be determined at the inception of the case, prior to preparing the defense. Only then can it be determined whether or not the prosecution actually has a strong case.


What Are The Common Reasons That A DUI Case May Be Dismissed?

I am able to have most DUI cases dismissed for a number of different reasons. Sometimes there is a legal defect in the case, or what somebody might call a technicality. Other times it might be a constitutional basis. A case could be dismissed if it was determined that there was no probable cause to make that traffic stop. A case can be dismissed if there was no probable cause to arrest them for a DUI. I have had situations where there is a roadblock or a roadside sobriety checkpoint, and I was able to have it determined by a judge that the entire checkpoint system was performed in an unconstitutional manner. Sometimes, they are forced to dismiss a case if I am able to exclude or suppress certain evidence. It may be the only evidence that I do exclude, which is the only information they had against my client to begin with.

How To Select The Right Paint For Your Garage Epoxy Flooring

Are epoxy floors worth it?

The first thing you need to know is that garage floor epoxy coatings are not like regular floor paint and that all epoxies are not the same.

So exactly what are epoxy floor coatings? Epoxy floor coatings are usually two part solids based, solvent based or water based. Epoxy flooring consists of a Resin part and a Hardener part, much like epoxy glue. Regular garage floor paints are one part oil based or water based. High quality epoxy floor paints are neither one part, oil based nor water based and all epoxies are not the same and you need to know why so you don’t have to do your floor a second or third time.


Why Should You Epoxy Your Garage Floor?

When the compounds in epoxy are mixed together, a chemical reaction starts and unlike paint, epoxy doesn’t dry, but cures. But once it’s cured, the finish is unlike any other flooring you can get.

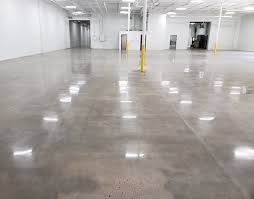
Besides its appealing surface, epoxy has a high tolerance to chemicals, stains, impacts, scratches, and chipping. If you drop something heavy on the floor you won’t see as much as a crack in the epoxy. And when that transmission fluid spills all over the garage, cleaning it off the hardened resin is much easier.

Another advantage of having an epoxy coating for your garage floor is the fact that it can cover any imperfections in the cement floor. Cracks and small holes, especially where the floor meets the wall are common in garages. And these can become homes to spiders and other insects. Epoxy covers all these holes and gives the floor a professional and clean finish.

If you live in a humid region or it snows a lot in your area, then moisture must be one of the problems you have to deal with in your garage. It leads to mildew and mold breakouts and attracts pests. Epoxy is highly resistant to moisture and you can clean road salts and icy brines off it with little effort.


Are epoxy garage floors worth the investment?

One of the most common questions that people ask when considering ways to improve their garage is whether an epoxy concrete floor coating is worth the investment. You may have seen a neighbor’s garage looking sleek and unusually clean, and they may have told you that epoxy is the secret to transforming their garage from an outdoor-area to sleek indoor-outdoor workspace.

But is it worth it? How much money will you save on garage maintenance by installing an epoxy floor coating? And how much more might your home sell for with an epoxy-reinforced garage floor? Today, we’re here to answer your questions on whether epoxy garage floors are really worth the investment.

No more cracking concrete maintenance

Concrete maintenance is the single biggest cost associated with your garage. Most garages have floors of poured concrete which looks smooth at first, but concrete doesn’t last forever. Concrete is actually porous and made of a gravel medium that eventually breaks apart. Concrete swells, cracks, and then contracts pulling the cracked edges away from each other.

You can pour time and money into filling these cracks and trying to refinish or repaint your garage floor surface, but a far more practical answer is to apply a thick epoxy coating. Epoxy both provides a sealant and is more flexible than concrete, helping you to fill cracks, hide, and prevent cracks instead of worrying about them.

Your garage becomes easier to climate-control

Concrete is fairly susceptible to the elements and during a cold winter, the cold seeps up through your garage’s concrete floor turning the whole area into a freezer. This is not just uncomfortable for the family, it’s bad for your car!

With an epoxy coat on your garage floor, your garage is far easier to climate-control. Because heat will not escape and cold can’t seep up as easily, any use of space heaters or even ACs in the summer will more effectively keep your garage at a comfortable temperature.

Stop worrying about insect invasions through your concrete cracks

When the ants go marching into the house at the turn of the seasons, your job is to track them back to wherever they’re coming from and spray so the invasions stop. You can get every doorway and the home perimeter and yard. But sometimes, insects come straight up from the ground through the cracks in your garage floor. An epoxy coating seals those cracks and prevents new ones from forming so you can finally stop worrying about insect invasions sneaking in through the garage concrete floor.

Epoxy floors are child-safe and easy to clean

For some families, the garage is a place for the whole family. Maybe it’s where you keep your kid’s bikes and sports gear, maybe you host indoor-outdoor barbecues for the whole neighborhood out of your garage. Maybe you’re teaching family members the secret arts of automotive care. Some families even keep the dog kennels in the garage.

Epoxy floors make your garage even more welcoming to the family because the floors are easy to clean perfectly. Automotive chemicals and oils won’t soak in because of the smooth plasticky surface and when you run a mop over that epoxy, everything comes up. You could let your toddler play on an epoxy garage floor when you’d never be comfortable letting them sit on the dirty gravel and motor oil covered concrete.


Pros of Epoxy Floors:

Appearance

Compared to an average garage floor, epoxy floors are bright and professional. Their appearance alone makes them enticing to use. The smooth and even surface is also very easy to sweep and maintain. Since not much sticks to this type of flooring, cleaning up a mess a very easy.

Affordability

Compared to other types of flooring, the per square foot cost of epoxy floors are tough to beat. Since it can be installed directly over concrete and other flooring types, the installation costs are quite a bit lower than the others. Pricing remains one of the biggest and the most immediate advantages you’ll find with epoxy flooring.

Resistance

Epoxy floors are highly resistant to just about everything – oil, gasoline, bleach, transmission fluid, cleansers and more. This is one the main reasons they’re frequently used in garages and within the automotive industry. Besides withstanding chemical spills/cleaners, epoxy floor coating is also heat and water-resistant. They are almost impervious to most chemical spills without any negative effects on the coating.

Another pro is that these floors also resistant to bacteria and germs, which makes them very easy to sanitize. This is why epoxy is an excellent choice for hospitals and clinics.

Durability

Distinctly valued for their durability, epoxy floors have a longer lifespan than many other floor types. Concrete is the only material that beats it, but it needs to be properly sealed and maintained. Besides, an epoxy floor coating required concrete beneath it anyway. Epoxy floor coating makes renders concrete exceptionally durable. They also offer benefits of anti-fatigue and can be easily rolled-out on the cement without mortar or glue. But if you wish to go that extra step to care for your floors, consider getting yourself epoxy resins for wood on woodimprove.


Cons of Epoxy Floors:

Temporary

One of the major disadvantages of using epoxy on your floors is that it’s a temporary flooring solution. Though durable and resistant, you will have to replace it eventually. Unlike some other flooring solutions, everyday wear and tear takes it toll on epoxy floors. To keep things looking good, you’ll have to put down a new coat of epoxy. This is inevitable especially if heavy things are dropped on the surface of the floor.

pros and cons of epoxy floors

Cracks can develop and chipping is a very common issue. Thought chips can start out as a small annoyance, eventually they can lead to a large area of the coat peeling off of the floor. Wheeled carts and toolbox wheels also get caught catch as they are rolled over the damaged spot. The floor has to be repaired when this happens.

Slippery

Epoxy floors are relatively skid resistant. This con is not universal. It’s specific only to oil-covered epoxy since that can be very slippery. But they can also become very slippery when wet, which creates a dangerous situation. They are not a good choice in areas that may be prone to spills or water on the floor. This is another drawback. However, you can mitigate this risk, at least to some degree, if you’re able to texturize your floor.

Preparation

Getting the existing floors ready for applying epoxy is tedious. A significant amount of effort goes into it to. The concrete floor has to be clean and free of any grease, oil, or solvents before the epoxy coating is applied. Cracks will need to be filled as well. Cleaning concrete floors requires multiple attempts. All this preparation work required is a drawback.

The good news is that with the advancements in the manufacture and application methods, homeowners will find it relatively easy to apply using hand tools in a minimum amount of time.

Application

Apart from the extensive preparation that goes into getting the concrete ready, applying the epoxy coating is a time-consuming process. It also takes several days to dry properly. Additionally, the first coat of epoxy must dry completely before adding the next coat.

The Difference Between Shingle And Tile Roof

How to Repair a Loose Cement Tile Roof

Concrete or cement roof tiles are made with a mixture of cement, sand and water that is molded and dried in a kiln or tunnel. Pigments are added to the tiles to make them look like terracotta roofing tiles. Cement roof tiles are highly durable and crack resistant, with a marketed life expectancy of 40 years or more. They can come loose after extended exposure to strong winds, hail or earthquakes. Repair loose or cracked cement roof tiles by lifting up adjacent tiles and sliding new tiles under the wooden batten that holds the tiles to the roof.

  • Put on heavy work gloves and safety glasses. Ascend a ladder to the work area on the roof, taking the necessary tools.
  • Pry up the tile located above the loose tile with the flat end of a pry bar and the bend end facing down. Set the bend end of the pry bar gently down on the roof to prop the tile up. Do the same with the tile located directly to the left of the loose tile and the second pry bar.
  • Pull off any broken tile parts. Tap and crack any parts of the broken tile that will not pull out with a hammer and remove them. Tilt and lift the back end of the loose tile up and off the wooden batten, also called a hanger strip, on the roof.
  • Remove any loose nails from the loosened wooden batten with pliers. Replace the hanger strip if the wood is damaged or rotten. Nail the loose hanger strip onto the roofing felt with three even spaced roofing nails.
  • Slide the top horizontal ridge of the cement tile under the propped-up tile above and over the top edge of the wooden batten on the roof so that the top ridge on the cement tile rests on top of the wooden batten. Slide the left edge of the cement tile under the propped-up cement tile to the left.
  • Slide the pry bar out slowly from under the left tile and then slide the second pry bar out from under the top tile to finish installing the cement tile.


How To Repair A Tile Roof

Tile roofing is durable and adds great curb appeal to your home.  All roofing will need some maintenance and repairs at some point.  The following steps show you how to repair a tile roof.  Should you not have the tools or time our team is always ready to help you repair your tile roof anywhere in the Phoenix Valley.

Step 1: Identify The Cause

Clay tiles may leak because of several reasons. While some issues will go beyond your roof and will be related to other things to do with roofing or the installation methods, some of the common issues with clay tiles are:

  • Broken tiles
  • Cracked tiles
  • Collection of debris on the roof valley
  • Worn out or defective waterproof membrane

In order to fix the leak, you will have to fix the issue that applies to you. Keep in mind that the clay roof tiles will break easily under pressure, so be sure to be careful whenever you are walking on your roof to find the cause of the leak.

Step 2: Fixing the Membrane

If the issue is in the waterproof membrane, then you will have to remove the existing tiles and replace the membrane with a new one. Then you will have to retile your roof. You may need the help of a professional for the removal and re-tiling.

Step 3. Removing the Debris

The roof valleys, especially closed ones will collect a lot of debris. This can cause leaks. To remove the debris, so there is no more leaking, you will have to remove the tiles from the area, then clean the area out, and lastly reinstall the tiles. You may consider wanting to covertyour roof valleys to be open to help to avoid any collection of debris within the future.

Step 4. Fixing cracks

If you happen to notice any fine cracks within the tiles, then you may repair them by applying RT-600 on the cracked tiles and then allow it to spread on the whole tile and let it dry.

Step 5. Fixing broken tiles

Tiles that have large cracks or are broken will need to be replaced in order to fix the leak. You will need to remove the damaged tiles using a pry bar. Use a hammer to help with the removal, but be careful to make sure that you will not damage the good tiles. If the roof is old, then the chances are that the tiles have been fixed using mortar. If this is the case, place the new tiles and use mortar to seal them in place.


Water-Testing for Roof Leaks

If you can’t find the cause of a leak from the attic or by visual inspection on the roof surface, wait for dry weather and ask a friend to help you do a water test. To do this, one person goes onto the roof with a garden hose; the other person goes inside the attic with a bucket and a strong light.

The person in the attic watches carefully while the one on the roof floods the roof with the hose, starting at the bottom (the eaves) and slowly working uproof until water from the leak appears in the attic. Once the leak is found, push a nail up through the hole to mark its location for rooftop repair. Mark the surface of the roof with chalk, if necessary.


Remove Damaged Slate Tile

The proper way to remove a roof slate tile utilizing a slate ripper. Jurin Roofing Services, Inc.

When slate tiles are damaged there usually are remnants of the tile left behind including nails. As a result, the second step in replacing a missing or damaged slate tile is to remove those remnants. This includes the nails used to attach the slate. This must be completed prior to the installation of the new slate tile.

Insert the top end of the slate ripping tool under the bottom edge of the slate tile or into the location where the tile is missing. You will notice that the slate ripper has a hook on either side of the top of the flat end of the ripper. The hooks are used to catch and cut the nails. As you catch the nail with the hooks, use your hammer to hit the handle of the slate ripper to drive the hook down against the nail. This will either cut the nail, or it will rip the nail out. Afterward, use the slate ripper to lift up on the slate and slide the slate out from its position.


What Causes Leaks at Valleys

Installing top flashing offers numerous advantages compared to other types of flashing available on the market, such as aluminum, lead, steel, or copper. Top flashing will effectively protect your tile roof from leaks in addition to being environmentally friendly and quick, hassle-free installation. Top flashing works well on virtually all flashing applications, offering durability and weather resistance.

How to Fix Leaky Roof Flashing

Most roofers will simply rely on sealants to waterproof difficult transitions; such as walls, plumbing stacks, or valley returns. As a result, sealants dry out and crack after a few years. So, while you believe your roof is performing well, the roof is slowly leaking with each rain causing havoc. Even when most roofers repair leaks, they again rely on sealants as waterproofing. In just a few years, the same leak is back.

Installing proper transition flashings using metal or flexible metal in these troublesome and high water volume areas is the correct way to fix a leaking roof. Using long-lasting materials ensures they will not break down from the exposure to sun or excess water flow.

Additionally, you should ensure your roof is inspected and/or maintained regularly to help it last up to twice as long. The most common areas to install flashing are around skylights, ridges, valleys, chimneys, and roof penetrations. Typically, flashing is the last line of defense before water damage.

Repair Couplings Are Efficient Tools That Manage All Broken Pipes In Plumbing Systems

Plumbing Leak Detection, Hidden Trouble of Pipe Corrosion

There are many reasons by a water pipe can be compromised, from corrosion to poor installation. No matter what the cause, if they aren’t repaired properly, they can end up putting a huge dent in your wallet.

Think you know everything about leaking pipes?

Whether it is a large gash in a pipe or a small pinhole drip, the water coming out disintegrates the materials the pipes are made from. So that small leak behind the wall you didn’t even know existed, will just get larger over time, leading to more damages and higher repair cost.

Hidden Trouble

Most water leaks are hidden from view, whether under a concrete slab or behind the kitchen sink. Hidden water leaks can be detected in higher than normal water bill, a musty odor, unexplained mold, warm areas on the floor, blistering paint and peeling wallpaper.

Wasted Water

According to the Environmental Protection Agency, “The average family can waste 180 gallons per week, or 9,400 gallons of water annually, from household leaks. That’s equivalent to the amount of water needed to wash more than 300 loads of laundry.”


Tub and shower: Splash leaks

Splash leaks are simply water escaping past a shower curtain or a shower door. Plumbers tell us it’s the most common type of bathroom leak. Although it may sound minor, this leak causes major damage when water seeps into the subfloor where flooring meets the tub or shower. Before long the vinyl flooring or tiles begin to loosen. Even worse, the plywood subfloor delaminates and rots, requiring a huge, expensive tearout and replacement project.

Signs of trouble:

  • Curling vinyl flooring or loose tiles next to the tub.
  • Peeling paint or flaking, chalky-looking wood finish near the shower.
  • Water stains on the ceiling or joists below.
  • Mold spots on the wall or floor near the tub or shower.
  • If you use a curtain, look for standing water on the floor after you shower.

How to find the source of a bathtub drain leaking:

  • If you have a shower door, splash water all around the door and frame. Leaks around the frame may take five minutes or longer to show up.
  • If the door has rubber gaskets or a rubber door sweep, check them for gaps.
  • Also check for any gaps in the caulk where the shower or tub meets the flooring.

How to fix a leaking tub drain:

  • Be sure to overlap sliding doors correctly when you close them. The inner door should be closest to the faucet.
  • If you have a shower curtain rather than a door, make sure you close it completely when you shower, or add a splash guard.
  • Seal a leaking frame by running a small bead of tub and caulk around the inside of the frame. Force the caulk into any gaps between the frame and the shower surround. Quickly wipe away all the excess caulk. When the caulk dries, test for leaks again.
  • Replace any worn gaskets or door sweeps. Bring the old one to a home center or plumbing supply store and look for a matching replacement (be sure to get the correct size to fit).
  • If the old caulk along the floor shows gaps, scrape it out and run a new bead.


Smart ways to find hidden water leaks without destroying your house

A water leak can result in serious problems, especially if it goes unnoticed. If you even suspect you have a leak somewhere, there are a few clues and ways you can detect it before it’s too late.

Check out these fives tips on how to detect water leaks so you can correct and stop the problem before it gets out of control.

  1. Monitor Your Water Meter

If you start to notice a higher water bill but you know that your water usage hasn’t increased, it’s a good sign that there’s a leak. Keep a close eye on your water meter to see if you detect any huge fluctuations. While you’re outside, make sure that there is no water source accidentally left turned on such as a garden hose. Turn all water off including inside water before you check the meter.

Next, take a closer look at the leak indicator and look for any movement. It depends on the type meter you have but for many, it’s a triangular-shaped dial. It may also look like a small silver wheel that spins when water flows through it. If either of these types of dials is turning after you’ve turned the water off, you likely have a leak. Another option is to take a reading and then wait an hour or two.

Take a second water meter reading to see if anything has changed. This is how to detect water leaks for most of your home. Just make sure you haven’t used any water during that hour to a two-hour window.

  1. Check Your Faucets

For many homeowners, the source of a water leak stems from the faucets. A worn rubber washer is often the culprit and can be found underneath the handle. You can easily replace the washer if you have the correct tools. You will need to turn the water off under the sink, or at the main cutoff valve.

Next, remove the faucet handles to access the gasket. Most home improvement or hardware stores sell replacement gaskets and the tools you need to fix this simple, common problem.

  1. How to Detect Water Leaks from Your Toilet

The toilet is another common culprit for water leaks, and it can often go unnoticed. A leaky toilet can waste several hundred gallons of water, which also means it can waste quite a bit of money.

Remove your tank lid and add a few drops of food coloring to the tank. Dye tabs are another easy alternative that can be purchased at many hardware stores.

Let the coloring saturate the water and wait approximately 30 minutes without flushing. If any color has come through the tank and into the toilet bowl, you likely have a leak.

Luckily, these types of leaks can often be resolved by replacing the flapper. The flapper has likely just worn out over time or become cracked which causes water to constantly flow from the tank into the bowl without you even noticing.

Another toilet-related red flag? If you need to jiggle the handle to keep your toilet from running, you likely have an issue with the flush bar and chain sticking.

You can fix this by adjusting the nut that secures this mechanism inside the tank. Or, you might need to replace the handle since it could be sticking.

  1. Perform a Visual Inspection

Leaks coming from plumbing inside the ceiling or walls can slowly go unnoticed until it’s too late. You can stop these types of leaks before they get out of control with a simple visual inspection.

Take a closer look at your walls and ceilings in every room. If you notice unusual staining or discoloration, you could have a hidden leak. A burst pipe is definitely something you want to fix as soon as possible.

Be on the lookout for mold or strange dips and bowing the ceiling or walls. Water damage will cause the material to stretch and eventually cave in.

This isn’t something you should stress about too much, but an occasional visual check can’t hurt. Often, people don’t know about a serious leak until their ceilings are completely caved in.

  1. Be Aware of Underground Water Leaks

Outdoor water leaks can get quite expensive to repair, so it’s important to know what to look for. If an area of your yard seems softer than others or you notice dark spots, this could be cause for concern.

If one particular area around your home seems to stay wet even after a dry spell, this is a red flag. You can also look closely near your driveway and street and see if you notice any unusual water flow.

Water flow doesn’t have to be a constant stream of flowing water. Even puddles that seem out of place may indicate that there’s a deep, underground leak.

If you suspect that you have an underground leak, call your local water or utility company as soon as possible. They have the tools and the know-how to further diagnose and fix the issue.


How to Connect a Water Softener Using Push Fittings

When your soap doesn’t lather and the toilet is staining, hard water could be the culprit. Hard water consists of large amounts of calcium, iron and magnesium minerals. Water softeners use an ionization process to capture these minerals and recharge the ions with sodium. Water softeners can be plumbed with copper, PEX or CPVC piping. Push-fit fittings create an opportunity for homeowners to forgo expensive plumbing equipment or soldering skills and install the system themselves.

Water Softener Installation

  • Close the main water supply valve and open all faucets. Drain water from the home’s plumbing.
  • Cut into the water supply line above the water softener using a pipe cutter. Allow enough space between the cuts for two push 90-degree elbow fittings to be installed.
  • Deburr the end of the pipe with a deburring tool. Deburring prepares pipe ends and removes sharp protrusions which can cut the gaskets inside the push fittings, creating future leaks.
  • Insert the push fitting 90-degree elbows into the water supply line and firmly push until completely seated.
  • Measure the distance from the 90-degree elbows on the main water supply to the bypass valve on the water softener.
  • Cut the pipe to the measured distance using a pipe cutter and deburr the ends.
  • Insert the pipe ends into the 90-degree elbow push fittings until fully seated.
  • Insert the other end of the pipes into the bypass valve on the water softener using the installation parts supplied by the manufacturer.
  • Close open faucets, open the main water supply valve and check for leaks.


Tips

  • Check code requirements in you area to insure proper and legal installation.
  • Push fittings can be removed and reused using a special removal tool.
  • Outside house bibs do not require soft water and should be plumbed upstream of the water softener.
  • PEX stands for cross-linked polyethylene, while CPVC stands for chlorinated polyvinyl chloride

Efficient Interior Painting

About Interior House Painting

Considering interior house painting? Are your interior walls of your home looking a little dull? Maybe you’re tired of white or off-white walls and want to liven up things. If this is you, then take note, there a few things you may want to consider before you pull out the paint rollers and start your interior painting project. Interior house painting makes for great weekend DIY projects. The fall and winter months are a good time to take on this task. By the time Spring rolls around your home can have a fresh new look. Interior color trends change, so you want to know what’s hot and what’s not.

Before you head out to the nearest home improvement or paint store, check-out these 4 things you need to know about interior painting.

  1. Don’t Be Afraid of Color

Color is everywhere so why settle for boring when it comes to the interior paint color of your home. Be bold and daring and transform each room with its own unique theme. Or find a color theme to play with throughout the house.

You can even create contrast by using a satin finish in one room and a matte finish in another. Or you can stick with a semi-gloss on every wall. But be ware, semi- gloss will emit a bit of shine.

The goal is to step out of your comfort zone and try new colors.

  1. Let Technology Help You Choose

Don’t spend hours or days going back and forth to the paint store in search of the perfect paint color. Plus, those sample cards can often be off if the lighting isn’t right. Thanks to technology, you can now paint your wall virtually with apps you can download to your phone.

Each app has its own feature. Some are from the makers of specific interior paint brands.

  1. Measure Rooms to Get the Correct Amount

Don’t make extra work by running back and forth to the store to buy extra paint. You also don’t want to get stuck with too much paint.

Measure your room from ceiling to floor and corner to corner. You will also want to measure the size of both the doors and windows in the room.

Once you have the area of the space, multiply by 2 to cover the two coats you will most likely need. If you choose not to prime your walls you may need additional paint. It is best to buy paint that already has the primer included. Do your homework to understand paint quality.

  1. Mix Gallons for Uniformity

Just because the paint you buy is mixed using the same formula, it doesn’t mean it will be uniform once applied to your walls.

To avoid this issue, get a 5 gallon bucket from your home improvement store and mix the cans of paint. In painting terms this is often referred to as boxing the paint together. If the container does not come with a lid you may need to pour it back in the original cans. Otherwise, you will need to get your painting done in one day.


What’s a Monochromatic Color Scheme?

When colors are in harmony with each other you can call them monochromatic. Harmony doesn’t mean every color is the same. Instead, you’ll have a well-balanced room with dramatic color variations.

For example, you could choose a gentle red color for the main interior walls. Then use different hues of red for your decorations. Have fun and be creative as you play with your interior palette.

Smoothly Transition Room Colors

One of your goals should be continuity from room to room. If one room has a cold wintery feel, the next room shouldn’t be a brilliant red theme. Instead, the next room could be more silver than white and slowly you can transition to louder colors.

One way to help the rooms tie together is to get multi-colored decorations. Ideally, you should find several decorations that all use the same 3 colors. Let’s say you find garlands that use gold, silver, and red. Then you can use paints in separate rooms, using those colors.

One room will be gold, one silver and one red themed. In a common living area, you’ll use the multi-colored garlands. While each room expresses its own individuality, the entire home will be one visual delight.


Oil-Based Versus Water-Based Paint

There are options when it comes to what type of paint to choose for your home interior. There are several different kinds of water and oil based paints. We won’t be able to cover them all. But here are a few of the standard varieties.

Oil-Based Paint

Oil-based paint typically dries more slowly. This will increase the chances of it leveling and eliminating brush strokes. Oil based paints are used for several applications. As it pertains to interior house painting, it’s typically applied on wood or interior trim. surfaces. But with everything there is always a drawback. Oil-based paint is more likely to turn yellow, crack, or fade were there is little light. Especially on the back sides of closets door.

Another thing to consider is the fumes of oil paint. Oil-based paint is considered a household hazardous waste.

It’s flammable and has to be disposed of properly. It has extremely high levels of volatile organic compounds (VOCs) like toluene and xylene.

Oil-based paints are also notoriously difficult to clean. If you get paint on a surface, you need to clean it with a toxic chemical such as mineral spirits or denatured alcohol.

Water-Based Paint

Water-based paint – also known as acrylic or latex paint – dries faster and is less likely to turn yellow over time. It also doesn’t give off those strong fumes. If you get paint on interior surfaces, you can easily clean it up with water and soap.

In fact, water-based paint is more environmentally-friendly. It’s not considered a hazardous waste. Just make sure you purchase an acrylic enamel if your searching for comparable durability of oil.


Never Underestimate the Primer

One of the keys to getting a great, even finish is priming your walls before you paint your walls. The primer evens out small differences in texture and color. It also helps paint cover better if you’re painting over a bright or dark color.

Primer is especially important if you have patches or holes in your wall. These materials can interact with paint in a different way so the texture looks different. A primer will even it out so you that after you paint, you can’t even tell the patch existed.

However, professional interior house painters that have a high level of product knowledge may be able to recommend specific paint products that are less likely to flash.


Quality and Color

Another huge factor to consider, of course, is the cost of the paint! Some contractors will offer you a specific set of colors and/ or products that are already included in their price and fees. Others will require you to buy your own paint upfront, it really just depends on who you go through.

If you are purchasing your own paint, the quality and color will make a big difference. Some paint colors are difficult to achieve, and will, therefore, cost more to purchase. Therefore, hiring a full service painting contractor maybe the way to go. They should be able to offer recommendations based on the painters experience applying several colors and products.

Some paints have a much higher value because of the sheen, the thickness, ease of use, and more. A cheap bucket of paint can cost as low as 15 bucks. However, in most cases you will end up using more product due to lack of coverage. While it may be tempting to buy the cheap stuff, especially when you’re going to be needing 10-plus buckets for a whole home job, it’s important to remember that you get what you pay for.

Whereas, some ‘higher end’ paints can cost up to $70 or more for a bucket! In most cases, they are simply overpriced and you will never see the real value for the additional cost associated with such a premium.

Picking quality paint will give you better-looking results that require fewer coats and last much longer. Keep that in mind when pricing or receiving recommendations.

Recent Posts