The Process Of Hiring A Wedding Photographer

TOP TIPS FOR CHOOSING A WEDDING PHOTOGRAPHER

So, you have a dress, the suits, flowers, cake and a band….but what is the one thing that will remain an everlasting memory of your wedding day? Your photos should be a beautiful and timeless account of the most important day of your life and should help every bride and groom to re-live the romance and excitement allover again.

Image quality/style

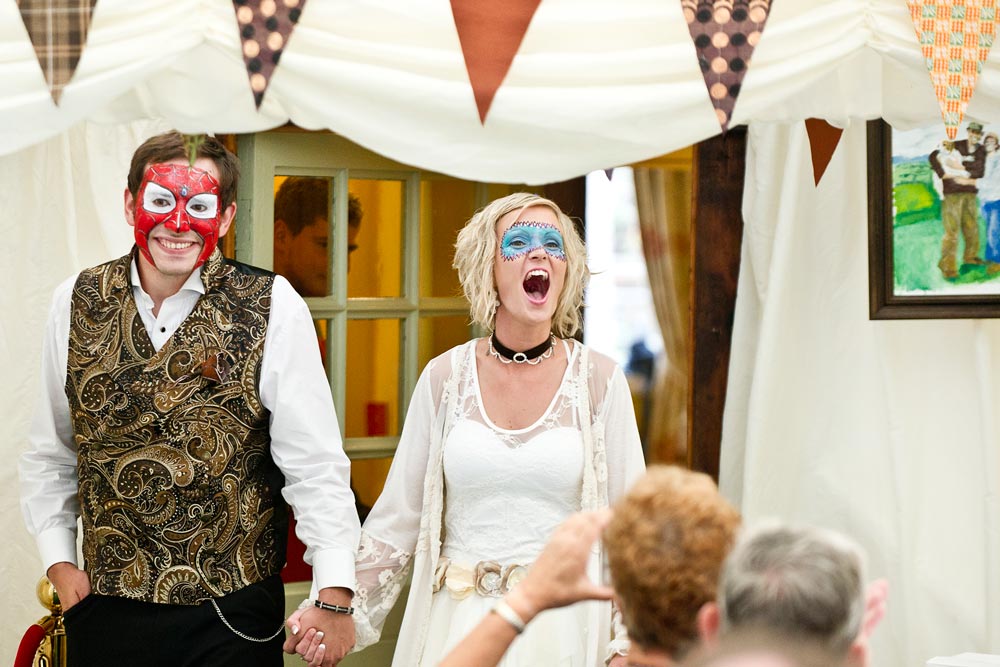
The quality of a photographer’s portfolio should be the first thing that captures your attention. A good photographer should be able to offer clients a variety of styles, capturing the personalities of the bride and groom and showcasing the happiness and fun of the day. Be clear on what style you would like and make sure the photographer can provide this in their portfolio.

Personality

As a bride and groom, you put a lot of trust and faith in your wedding photographer. In order to get the best images and a true account of the most important day of your life, it is imperative that you feel comfortable and relaxed in their presence.

Value for money/cost

This can often be a deciding factor for a lot of brides and grooms and although it is a vital element, it should not be the basis for your decision. High-end prices do not always guarantee the highest quality but likewise, reasonable pricing does not always depict low quality.

Experience

The experience a photographer has will play a large part in the organisation and structure of the day. I am sure many photographers will agree that they have often played the role of coordinator, photographer, master of ceremonies and children’s entertainer. Taking the photos is just a small part of being a wedding photographer and without the necessary experience and the ability to perform under constant pressure important moments can be easily missed.


Steps to Finding a Great Wedding Photographer

Unlike the work of your other wedding vendors (music, flower arrangements, cake), photographs aren’t things you can hear, smell, taste or even see at first—you don’t really know what you’re getting until after the fact. That means careful research and selectiveness regarding professional skills, artistic style and personal demeanor are extra important when choosing your photographer

Settle on a Style

Before you begin researching photographers, you’ll need to first decide what type of photography style you prefer, as that will help determine which kind of photographer you’ll want shooting your wedding. Get inspired! Spend time pouring over any kind of imagery you love, from décor shots to a fashion blogger’s Instagram feed. Once you have a good collection of inspiring photographs, try to narrow in on what draws you to them specifically and dissect what feels most authentic to you and your partner. Maybe that’s formal-posed portraits, a classic photography style or a lifestyle, photojournalistic feel. If you love sharp and contrast-y shots, perhaps a photographer with a flair for the dramatic is the right choice for you. Remember that you don’t necessarily need to narrow in on one style in particular, since many wedding photographers can do a blend of portraiture and documentary-style shots, a mix of black-and-white and color images and so on. But if there’s a special style you love, make sure to focus on photographers who specialize in it.

Do Your Homework

Start your search by reading reviews from recent newlyweds and browsing local listings, like the ones on The Knot Marketplace. Carefully review potential photographers’ websites and blogs to check out photos of other weddings they’ve shot, which will give you an idea of their style. How do they capture the moments important to you, like a mother bustling her daughter’s gown or an emotional first look? The design of the website may also have clues about the photographer’s personality and sensibility. Check out their Facebook, Instagram and Twitter pages too, if possible. Is the feedback from clients positive? How does the photographer respond? How do they interact with their Instagram followers, do they seem friendly and personable? You get the idea.

Set Up Interviews

This is not a decision that can be made on looks alone—you must meet your potential photographers in person. If you like what you see on their site—and their fees are in your ballpark range—call to see if they’re available for your wedding date. If available, go ahead and send an introductory email with a bit about you and your soon-to-be spouse, you event and the vision for your day, and feel free to attach five or so of your very favorite photos from your research so they know what you love. If the photographer is already booked on your date, you may want to see if they have an associate or can recommend another shooter with a similar style. Set up in-person meetings with three to five potential photographers who are available on your wedding date to look at more of their work and assess whether your personalities mesh. Be prepared to talk about your venue, wedding style and what you envision for your photos.

See a Few Full Wedding Albums

Don’t base your decision solely on what you see in a photographer’s highlights gallery or album. For good reason, photographers show prospective clients a portfolio of their best pictures, all from different weddings, so you’re seeing the best of the best. The problem with that is you won’t get a well-rounded idea of their work. Ask to see two or three full galleries from real weddings they’ve shot (not someone else at their company) so you can get a better idea of what your complete collection of photos might look like after the wedding. If you see that the full gallery photos are just about as good as the ones chosen in the highlight gallery (that is, they’re all so good it’s impossible to choose!), you’re on the right track. And ask to see at least one or two complete albums of weddings that are in similar settings to yours. For example, if you’re planning an indoor affair with dark lighting, don’t just look at weddings shot outdoors in natural sunlight. And if you’re planning to say “I do” on a beach at sunset, you’ll want to see examples of that.


Tips When Choosing Your Wedding Photographer

You’re engaged!   Time to celebrate and then start talking wedding plans.  If you are having a wedding there are a lot of little details to think about.  Where do you start?  Maybe you know you don’t want to have a large wedding and instead are planning an intimate destination elopement.  Hopefully you’ll want to have a photographer to capture your elopement as well.  No matter how large or small your wedding celebration is, hiring a professional photographer to capture all the love, emotion and in-between moments during your celebration will be well worth it to have images of your celebration to hold onto forever

Time to Research

Once you’ve set a date it might be time to start researching wedding photographers.  Generally speaking photographers are booked 6 months to one year out.  I know from experience narrowing down a photographer can be tough.  There are so many creative, talented individuals in this industry and I had a huge list of potential photographers to choose from.

Where are They Cutting Corners

I don’t want to claim all inexpensive photographers are not good at what they do; everyone has to start somewhere and many do have a great eye but as you determine where you need to cut corners on wedding planning maybe those insanely cheap photographers are also cutting corners somewhere too.  When you hire an experienced wedding photographer, you aren’t just paying someone to be a warm body to click the camera.  You are paying for the experience.  Their experience shooting weddings and THE overall experience from start to finish.   Your wedding day is going to be filled with amazing moments, emotions and don’t forget those little imperfect moments too…..  one of those imperfect moments should NOT be worrying about your wedding photographer

Have a clear idea of the STYLE you like.  This will help you narrow down the selection of photographers.   Are you attracted to more traditional photography, posed images and pretty smiles starting at the camera?  Do you prefer a documentary feel where the photographer goes unnoticed with no posed images?  Is a candid style that captures the big emotions and little details to tell the story of the entire day your preference?  Are you looking for someone who is going to unnaturally pose each image, interrupting the natural moments from happening or someone who is going to go with the flow, capturing the dirt on your dress while you walk through a mountain field, quietly soaking in the beauty of day?

Get to know your photographer.  Do your personalities mesh well?  Your photographer is going to spend a greater chunk of the day with you…. make sure you can tolerate them and maybe even like them.  ?  Just because your family feels obligated to use the local photographer you have known since you were a child…. doesn’t mean you need to.  I saw this happen once and said photographer ended up passed out drunk under a tree before the reception started.  NO JOKE.  It’s your wedding day.  Pick someone who’s work you are drawn to.  I love getting to know each of my clients better — doing this creates great rapport which is actually important when creating images filled with REAL emotion.  When you look at a photo, I want you to feel something


Tips to Choose the Right Wedding Photographer for Your Day

Wedding day memories and scenes are too precocious to be missed. So you need to capture them and preserve them in order to reminisce about them for years to come. That’s why it’s important to have the right wedding photographer by your side to click some of the best photos of your wedding day

Start your search as early as possible

Top photographers are always in big demand. Their services have many takers and you should not expect them to be available during the wedding season. After all, experts have their hands full year-round as far as assignments are concerned.  Some of them even get booked a year or so in advance and you need to understand that well.

Do a lot of research before finalizing one

When you do a lot of research into wedding photographers, you’re always likely to get good results. After all, there are different styles of wedding photography, different packages and costs to choose from. The more wedding photography website you visit, the better it will be for you in terms of finding the best man for the day.

Interview the photographer and check samples of the work

You should never hesitate to conduct an interview with the wedding photographer to be sure about their experience, expertise, and knowledge of the craft. It’s also important to prepare a list of questions beforehand so that you discuss in details everything you want to know from the photographer.

Ask about the equipment, style, cost, creativity, and art

A good wedding photographer is one who is passionate about the job he/she does. They will have unique styles and tones to capture events and create visual differences. Some use only the latest camera and equipment and also have a back-up in case of malfunction


Mistakes To Avoid Choosing A Wedding Photographer

Some brides make the mistake of selecting their wedding photographer without researching what they’re really getting for their money. “You get your negatives” sounds great, but when do you get them? The original price sounds great, but how much are extra prints? So often, brides buy a package knowing they don’t want everything in it, but they think they’re getting a deal because it’s all together. Nope, sorry, photography is not like buying a “value meal” at McDonald’s! To be sure, you must research before you decide. Visit as many studios as you can. As a courtesy, please call them first and set an appointment. If they’re friendly or if they call you back quickly, they’ll most likely have better standards of service. Ask if they have any information they can mail or email to you. Meet the photographer. Search through their website with a fine-toothed comb. Do you see any loopholes or issues? The biggest reason people make mistakes in hiring photographers is that they don’t have experience doing it! They’ve never had to hire photographers, and most likely their last experience with a professional photographer was a friend’s wedding, and the grumpy, sweaty, old guy was either a bore or an annoying jerk.

Find someone who cares more about your wedding images than they do about their own packages and policies. Someone you know will help your wedding run smoothly and efficiently. Choose someone that you can communicate with someone that truly understands how you want your wedding to feel. How do you know? When you talk to her, she’s more interested in learning about you than describing all of the print sizes and prices.

Is this someone that will add to the fun and emotion of your wedding? Remember your friend’s photographer, the grumpy, sweaty, old guy that was a boring, annoying jerk? Steer clear of that! Get someone that will make the work of posed pictures fun, memorable, and exciting! How can you tell who’s cool? When you talk to the photographer, ask how she feels about your family members taking pictures over her shoulder! If she stays relaxed, then everyone will have a good time.

Look for someone who has some flexibility in styles. See what they have to offer. Some of the styles you may want to consider are Traditional, Black & White, Candid, Romantic, or Photo-journalistic. Check to see how they handle both indoor and outdoor situations. Can they do fine portraiture as well as a truly candid style? Find out what they have for you. Remember that the photographer’s creativity and personality (and your rapport with him/her) is what makes your wedding images unique, and your expressions more genuine!

Find someone who has as few restrictions as possible regarding packages, number of prints, limiting locations, and limiting the amount of film they shoot. Prepaid, pre-designed packages limit the creativity of the photographer. Creativity does not come from a pre-packaged album containing, for example, 24- 8x10s. If you’re paying for an album, it should look and feel like a storybook! Think of it, not like a photo album, but an illustrated storybook that uses no words to tell the story. In most cases, packages are NOT a good thing because the photographer “knows” beforehand what he needs to shoot and will only strive for those images.

Some Information On Toilet Installation

Tips for Choosing a New Toilet

The traditional gravity-flush toilet is pretty trouble-free plumbing fixtures, thanks in part to the fact that it has no high-tech parts. Although the water-supply valves, flush valves, and wax ring that seals the toilet to the floor all may fail and need to be replaced from time to time, the porcelain or china fixture itself can last for decades in perfect operating shape unless the bowl or tank become cracked. Nevertheless, you may want to replace your toilet, either for purely aesthetic reasons, such as when remodeling a bathroom or to take advantage of new water-saving features available on modern toilet designs.

Taking Measurements

The first step is to measure carefully to ensure that the toilet you purchase will fit in the same location as the old one. Measuring is done with the old toilet still in place.

Researching Your Options

With measurements in hand, it’s time to consider what options are available for your new toilet—and there are quite a few.

Bowl Shape

When choosing a toilet, you can choose from those with bowls that are elongated, compact -elongated, or round-front. Elongated toilets offer deeper seating areas and will fit most residential applications. Compact-elongated toilets have a slightly shorter footprint and take up less space while still offering good comfort. Round-front toilets take up the least space and are a good choice where space is at a premium.

Seat Height

Standard-height toilets have a seat that is roughly 17 inches above the floor. Chair-height toilets are slightly taller at about 19 inches above the floor, making them much easier to use for older people or those with mobility limitations. There are also custom-height toilets that mount on the wall and can be set at heights ranging from about 15 inches to 28 inches above the floor.


Tips to Ensure You Get the Right Fit and Flush

Measure for fit

Your first step in choosing a toilet is to find your current toilet’s rough-in measurement so you can find a model that fits your bathroom. The rough-in measurement is the distance from the wall to the middle of the toilet flange, which lines up with the center of the hold-down bolts. For a toilet with two bolts on each side, measure to the center of the back bolt. If you’re measuring from the lowest part of the wall, take the thickness of the baseboard or molding into account. Ideally, measure directly from the wall.

Choose your design

When choosing a toilet, you’ll need to decide if you want a one-piece, two-piece or wall-mount design. Two-piece toilets are the most common. These plumbing fixtures have a separate bowl and tank you can buy together or separately. Because there are so many on the market, opting for a two-piece toilet gives you a greater chance of finding one with the features you want.

Decide on bowl type

Toilet bowls are available in two shapes: elongated and round. Elongated bowls are around 2 or 3 inches longer in the front than round bowls. Round bowls never surpass 28 inches, while elongated bowls can be as large as 31 inches. Despite the fact that they take up more space, elongated bowls offer some advantages. Some individuals, including the elderly and those with physical impairments, may find the bigger seat more comfortable because it supports the thighs like a chair. These bowls also retain less soiling and hold back odors better. For some, the streamlined oval shape is more visually appealing than the traditional round shape.

Decide on height

Standard toilets are around 15 inches from the seat to the floor. Although this height is comfortable for many, you may be better off choosing a toilet with a higher seat. Seats of 17 inches high are marketed as “comfort height” and are better suited for the elderly and those with physical impairments. In fact, this is the height the American Disabilities Act requires for public toilets.

Consider a dual-flush toilet

Toilets account for up to 30 percent of the water use in the average US home. If you’ve had bad experiences with water-conserving toilets, though, choosing a toilet designed to save water may not seem too appealing. Older models of water-saving toilets simply reduced the amount of water used, leaving you with no choice about how much too use. Newer models have changed that.


Tips on Choosing a New Toilet

Choose the right toilet height.

Toilets usually come in a standard height (the height you’re probably accustomed to) and a comfort height, which is two or three inches higher than the standard height. Unless you’re buying a toilet that will be used often by children, comfort height toilets are usually the most comfortable (hence the name)

Consider water-saving toilets and dual-flush toilets.

Nowadays, the maximum amount of water a toilet can use during a flush is 1.6 gallons, which is far less than toilets in the past, so if you’re replacing an old toilet, chances are any toilet you buy will use less water than your old one. However, if you really want to decrease your water use, consider buying a toilet that’s specially designed to conserve water or a dual-flush toilet, which has a low-volume flush for times when just a little water will work and a standard-volume flush for times when you need a normal amount of flushing power

Decide whether you want a two-piece or one-piece toilet.

Two-piece toilets have tanks and bowls that are separate pieces and are the standard toilet used in most homes. Two-piece toilets function well, and many people are perfectly satisfied with them; however, some people prefer one-piece toilets, in which the bowl and the tank are fused into a single, seamless unit. One-piece toilets are easier to clean than two-piece toilets, and they have a smooth profile and a sleek look that some people prefer.

Choose a bowl shape that fits your bathroom.

Toilets come with either round bowls or elongated bowls. As the name implies, round bowls are fairly round and work well in smaller bathrooms since they have a small profile. Elongated bowls are oval-shaped and are two or three inches longer than round bowls. Some people find the elongated bowls to be more comfortable.

Understand the different flush mechanisms.

For years, homes used only one kind of toilet: the gravity-flush toilet. These toilets use the weight of water to provide flushing power. The flushing mechanism is simple, which means these toilets are low maintenance, and gravity-flush toilets are perfectly adequate for many people. However, once toilet manufacturers began looking for ways to conserve water, they devised new ways to create flushing power, which resulted in assisted-flush or pressure-flush toilets. These toilets use air to increase flushing pressure, which results in a more powerful, efficient flush.


Tips for Buying a Toilet

to paraphrase Gertrude Stein, a toilet is a toilet is a toilet. Or so you’d think, until you take a look at the spectrum of possibilities available from today’s manufacturers and see that styles and shapes abound. Add in options for comfort, interactivity and water conservation, and today’s toilets can do almost anything—including glow in the dark

From taking care of your most basic needs to elevating your green quotient to making the ultimate style statement, there’s a toilet that’s right for you and your budget. Expect to pay anywhere from $100 for a basic commode to more than $7,000 for an ultra-chic toilet with all the amenities.

Two-piece toilets. These traditional models have separate tanks and bowls, which make handling easier, especially for DIY installations and for getting a toilet into tight spaces. The water inlet hole and the bolts used to fasten the tank to the bowl are sealed, and the seam between the two pieces is sealed with rubber gaskets. While the gaskets are good for years of service, they’ll eventually fail, causing leaks. Replacing the gaskets can be a hassle because the bolts and nuts tend to rust and “freeze,” requiring cutting.

One-piece toilets. This style eliminates the seam between tank and bowl. The result is a sleek design with no crevices to trap dirt. One-piece toilets tend to be more expensive than comparable two-piece models.

Round-front bowls. The snub-nose bowl design fits smaller spaces. Before the advent of the elongated toilet, the round-front was the only shape made.


How to Choose a Toilet for Your Bathroom: Tips from Experts

Choosing a toilet for your bathroom can be an overwhelming task. Of course, the first factor is your budget and how much the new toilet will add to your total bathroom remodel cost. However, there are several other factors that come into play as well. With so many sizes, configurations, and sizes available, your new commode should be able to meet all your requirements. Now, if you are not sure about what parameters you should consider for your next toilet purchase, go through this guide that entails expert tips on how to choose a toilet — which shall ensure you have a satisfactory buying experience.

Consider the Toilet Configuration

The first step to take before getting a new toilet is to calculate the size of your bathroom. Measure the rough-in distance — which is the length between the floor drain and the wall. You should consider a standard length of 12 inches, but you can also tweak it to measure anywhere between 10 to 14 inches, depending on the space available. Once this number is final, choose the bowl shape, toilet height, and style.

Elongated Bowls

Elongated toilets feature a bowl that extends out more toward the front for extra comfort. It takes up more space in your bathroom and is perfect if you have the luxury of more space.

Round Bowls

This category of toilet bowl — as the name suggests — comes with a round, compact design. It takes up less space and is best for small bathrooms.

Toilet Height

For standard toilets, the ADA-approved height for toilets is 15 inches off the floor. The rim or seat ring adds an extra 1 or 1½ inches. For more comfort, you can go for a taller toilet, up to 17 inches, if you have the luxury of space in your bathroom.

Maintaining A Commercial Painting Job

TIPS TO GETTING BETTER COMMERCIAL PAINTING RESULTS

One of the tricky parts of owning a business is getting the perfect look for your building. You want to appear professional and interesting in order to differentiate your business from your competition. Take the right steps to get great results from your commercial painting project to enhance the look of your building and your business. Here are five tips for getting better results.

Choose the Right Colors

While you want your business to catch the eye of potential customers, be careful to select colors that will attract attention without being overpowering. Having one bold-accent wall can really make a statement, but remember: less is more when it comes to very bright colors. By selecting a calm color palette, you can avoid overwhelming your customers. Adding bold color through pictures, pillows, and other small elements are temporary and less expensive ways to add a pop of color

Take the Time to Clear the Work Area

When commercial painting companies start a job, you won’t see them start applying color until the room is fully prepped. Before a contractor can begin prepping the room, they will need your employees to clear their work area. The best thing to do to expedite your painting project is to clear off work stations, remove art from the walls, and push light-weight furniture to the center of the room. By doing this yourself, you can save money on prep time (a cost of hiring the painting crew).

Use Primer

While some individuals may think that primer is an unnecessary step, many professionals say otherwise. Having that barrier in between the wall and your new layer of paint can prevent the color from turning dull once it dries and it can also help it to last longer. This problem often occurs because the compound used to fill holes and imperfections can pull the moisture right out of your freshly applied paint. If you are painting over a bright or deep color, primer is a good way to protect the integrity of the new color.


TIPS FOR PAINTING YOUR COMMERCIAL BUILDING

AVOID COMPLICATIONS BY FOLLOWING THESE STEPS

Painting your commercial building is an investment that should be approached strategically in order to avoid complications with the public while still getting the work completed and the look you want. A good paint job can create a positive first impression that encourages customers to come back to your premises over and over. Therefore, updating the look of your property with a fresh paint job is important for your business.

Consider the scope of the project

Take the time to consider the scope and extent of your painting project. How many buildings will need to be painted? How long do you have to complete the project? You should also consider what time of year would be most convenient to carry out the painting.

Choose the right color

Choosing the right color for your exterior commercial real estate is often an overlooked aspect. The right colors will make your buildings more attractive and appealing to customers. In fact, color choice could be the difference between a dull property and a dazzling masterpiece.

Adhere to high standards of safety

The safety and health concerns of your clients and tenants should be a top priority. Make sure you select the right paint that causes minimal health risks to people present in the space. Give preference to odorless paints to avoid problems for customers while you are open, during and/or immediately after the project occurs.

Consider additional services

Your commercial exterior painting project should involve more than just painting outside walls. The success of your project will also depend on additional services such as pressure washing, caulking, proper stripping and sanding, and restoration work to make sure the building looks at its best.


How to choose the Best Commercial Painting Company: Your Complete Guide

In this age of DIYs, a business owner may get tempted to do the painting job on their own to save on costs. However, it’s rare that you get to save huge amounts of money doing this. Sometimes, you spend even more.

That’s because you may spend as much as twice the amount of time it takes for a professional to complete the job. This time is better spent on building your business, which gives you better ROI. Hiring a commercial painting company also saves you from having to fix your mistakes.

Make a List of Painting Contractors

The first thing to do is to find potential contractors for the job. Google is the best place to look. But you can also ask your friends, family, and neighbors for any recommendations. This is more preferable than getting names off Google. As long as you trust the judgment of the people you asked, you’ll get introduced to a reliable company. When you drive home from work, look around for ads and physical stores of painting companies.

Get Estimates for Their Painting Services

Next, ask for their quotations for the painting job you need. This step should be free. You must already have a set budget in mind. Cross out those that get back to you with an estimate that’s way higher than your budget.

Factors When Choosing a Commercial Painting Company

The price isn’t the only thing you should look at when choosing a reputable commercial painting company. You should also look at the following information, which you can get by asking.


Must-Know Tips on Finding and Hiring the Right Painter for You

It’s a new year and that means it’s time for more home improvement projects. While exterior painting is best reserved for summer and fall, interior painting projects can be done right now. But first, you’ll have to find a reputable painter.

Painting projects may seem easy at first but it’s really best left to the professionals. They can get the job done in just a few days, or even hours, depending on the project. Besides that, you won’t have to worry about the mess – they’ll take care of everything!

Reputation

Before you hire a painter you need to be aware of their reputation in the community. Look for painters that have performed high-profile jobs. Also, ask former clients about the work performed and the quality of the products.

Licensing

Professional painters must be licensed to do business in their state. In Texas, the license is no different than that required for any business (Texas Sales and Use Permit), but confirming that you are working with a legitimate business provides a variety of protections to you.  Make sure that your painter can provide a copy of their license and license number as verification before they start a job.

Experience

Just because a painter answers an ad for painters for hire doesn’t mean that he or she has the experience to back up their query. Make sure your painter can provide a portfolio of previous work.


How to Hire the Best Commercial Painter

Are you a facilities manager or property owner? Do you need to hire a painter to freshen up the look of your buildings? If you’ve never had your building painted professionally, or if you have and weren’t satisfied with the results, how do you choose a professional commercial painter? This article provides tips for hiring a commercial painter who will provide quality results and great service

Commercial Painting Experience

First of all, don’t hire an amateur. You may be tempted to save some money by hiring some college kids or a handyman to paint your facility. What you’ll likely get is a shoddy end result because they aren’t knowledgeable about the specific requirements and processes required for commercial painting

Reputation

Regardless of the amount of experience a commercial painter has, you need to know that he’s going to do a good job. How can you tell if he hasn’t worked for you yet?

Communication

When you contact a company, whether it’s by phone, email, online or another method, you should expect a quick response. Granted, a business line may not be answered 24/7, but you should receive a response within no more than 24 hours.

Free Estimates

A commercial paint contractor should be willing and able to provide an accurate and free estimate on your project. They will make an appointment to visit your location and assess the site. They’ll solicit specifications from you, answer questions, and provide recommendations. They will then document the details of the project and present it to you for review and approval.

A Review Of Prominent Circuit Breaker Manufacturers

How to Choose a Circuit Breaker

There are a few different criteria to consider when selecting a circuit breaker including voltage, frequency, interrupting capacity, continuous current rating, unusual operating conditions and product testing. This article will give a step by step overview on selecting an appropriate circuit breaker for your specific application.

Voltage Rating

Circuit Breakers Available in Different Sizes & ConfigurationsThe overall voltage rating is calculated by the highest voltage that can be applied across all end ports, the distribution type and how the circuit breaker is directly integrated into the system. It is important to select a circuit breaker with enough voltage capacity to meet the end application

Frequency

Circuit breakers up to 600 amps can be applied to frequencies of 50-120 Hz. Higher than 120 Hz frequencies will end up with the breaker having to derate. During higher frequency projects, the eddy currents and iron losses causes greater heating within the thermal trip components thus requiring the breaker to be derated or specifically calibrated. The total quantity of deration depends on the ampere rating, frame size as well as the current frequency. A general rule of thumb is the higher the ampere rating in a specific frame size the greater the derating needed

Maximum Interrupting Capacity

The interrupting rating is generally accepted as the highest amount of fault current the breaker Control Panel Circuit Breakerscan interrupt without causing system failure to itself. Determining the maximum amount of fault current supplied by a system can be calculated at any given time. The one infallible rule that must be followed when applying the correct circuit breaker is that the interrupting capacity of the breaker must be equal or greater than the amount of fault current that can be delivered at the point in the system where the breaker is applied. Failure to apply the correct amount of interrupting capacity will result in damage to the breaker.

Continuous Current Rating

In regards to continuous current rating, molded case circuit breakers are rated in amperes at a specific ambient temperature. This ampere rating is the continuous current the breaker will carry in the ambient temperature where it was calibrated. A general rule of thumb for circuit breaker manufactures is to calibrate their standard breakers at 104° F


How to Choose the Right Circuit Breaker

Circuit breakers are a very important part of electrical safety. They control the amount of electricity that flows through a building’s electrical wiring system. If your home suffers an electric overload or a short circuit, a properly functioning circuit breaker will detect the issue and cut off the electrical supply. This will protect your wiring and appliances until you take care of the problem and restart the electricity. However, in order for a circuit breaker to do its job properly, you have to match the right circuit breaker with your exact needs. Read the following simple explanations and you’ll be ready to choose the appropriate circuit breaker for your home.

Low-voltage thermal magnetic circuit breakers are best suited for most single-family homes. They allow for electrical currents that measure only up to 1000 amps

Medium voltage circuit breakers are used in larger buildings, such as apartment complexes and businesses, that use up to 72,000 volts on a regular basis

High-voltage circuit breakers are used alongside power lines and in other places that use more than 72,000 volts regularly.

Figure Out the Breaker Size You Need

In order to choose the best-size circuit breaker for your particular household needs, check the wire size printed on the cable that is to be connected to the circuit breaker. You will see 2 measurements listed: The first will tell you the wire gauge, followed by a dash and a second number which indicates how many wires are inside the cable. Once you have established the wire gauge


How to Test a Circuit Breaker

Circuit Breaker Tester: Clamping Ammeter

Circuit breakers that trip every time they’re reset may be overloaded. In order to diagnose a circuit breaker overload you can test the circuit breaker by using a clamping ammeter. This circuit breaker tester is used to check overloads and shorts that are in progress and determine whether the electric current is running through the circuit. The clamping ammeter should be clamped to a single wire not the cable in order to accurately test the circuit breaker.

Circuit Breaker Tester: Electromagnetic Circuit Finder (Current Tracer)

Circuit breakers may trip and disconnect all electricity, but sometimes that is not the case. An electromagnetic circuit finder will test to see if the circuit breaker has a live connection. It will determine which individual breaker controls a live circuit.

Circuit Breaker Tester: Electrostatic Wand

Circuit breaker testing can be helpful if you are trying to determine the flow of electricity in the circuit breaker panel. A circuit breaker Need link should be tested even if you have turned it off; it is important to make sure the wires are dead and there is no current flowing in them

Circuit Breaker Tester: Multimeter

The multimeter circuit breaker tester combines the characteristics of a voltmeter and the ohmmeter in one. This multipurpose circuit breaker testing device has multiple functions. Like the voltmeter it measures the level of voltage in the circuit and also measures the continuity and resistance level (ohmmeter). Obtaining information about both electrical readings can help pinpoint circuit breaker problems quickly and accurately so that repairs can be made.

Circuit Breaker Tester: Voltmeter

Circuit breaker testing can get complicated when using small inexpensive testers. A voltmeter is a popular circuit breaker testing tool used by homeowners. This circuit breaker tester measures the voltage running through the electrical circuit. The voltmeter is used by touching one prong to each of the parts of a circuit between which you need to measure voltage. For example, you would touch one prong to the neutral wire and the other to the hot wire to measure the voltage in a circuit


How Circuit Breakers Work

The circuit breaker is an absolutely essential device in the modern world, and one of the most important safety mechanisms in your home. Whenever electrical wiring in a building has too much current flowing through it, these simple machines cut the power until somebody can fix the problem. Without circuit breakers (or the alternative, fuses), household electricity would be impractical because of the potential for fires and other mayhem resulting from simple wiring problems and equipment failures.

In this article, we’ll find out how circuit breakers and fuses monitor electrical current and how they cut off the power when current levels get too high. As we’ll see, the circuit breaker is an incredibly simple solution to a potentially deadly problem.

Voltage is the “pressure” that makes an electric charge move. Current is the charge’s “flow” — the rate at which the charge moves through the conductor, measured at any particular point. The conductor offers a certain amount of resistance to this flow, which varies depending on the conductor’s composition and size.

Voltage, current and resistance are all interrelated — you can’t change one without changing another. Current is equal to voltage divided by resistance (commonly written as I = v / r). This makes intuitive sense: If you increase the pressure working on electric charge or decrease the resistance, more charge will flow. If you decrease pressure or increase resistance, less charge will flow. To learn more, check out How Electricity Works.


How Circuit Breakers Work

The problem

It’s a dark and stormy night. You flick on the hall light, plug in the coffee maker and crank up the portable electric heater. You’re starting to feel comfy, when you hear a faint, yet ominous, click—and everything goes black. It’s not a cat burglar or a poltergeist playing tricks with your electrical system. It’s an overloaded circuit being protected by a tripped electrical circuit breaker. Kinda spooky and mysterious, eh? Not if you know a few simple things.

Figure A: A Properly Functioning 15-AMP Circuit

This circuit has wires and an electrical circuit breaker that can easily carry the amperage required by the devices

on it.

What’s a circuit?

When electricity enters your home, it goes to a circuit breaker box (or fuse box in older homes), where it’s divided into a number of circuits. Each circuit is protected by a breaker or fuse. Bedrooms, living rooms and family rooms where only lights, alarm clocks and other small electrical items are usually used are normally on 15-amp circuits. Kitchens, laundry rooms, bathrooms and dining rooms—places where you’re more likely to use toasters, irons, hair dryers and other big-watt items—are usually served by heavier-duty, 20-amp circuits. Major appliances like 5,000-watt electric water heaters and 10,000-watt electric ranges demand so much electricity that they take their own 30- to 50-amp dedicated circuit (See Fig. D in “Additional Information” below), protected by big, “double pole” circuit breaker sizes.

What’s a circuit overload?

The circuit breaker, the wire and even the wire insulation are all designed to work as a system—and that system has limits. Try to push more current through a circuit than it’s designed for and things start happening (Fig. B). Wires heat up under the burden of carrying the excess current. When this happens, the insulation around the wire can degrade or even melt. When insulation melts, current is no longer confined within the wire. That’s when fires start. Luckily, the circuit breaker senses the excess current and “trips” to stop the flow of power before damage occurs

Figure B: An Overloaded Circuit

This circuit has too many energy-demanding devices on it and is trying to carry more amperage than it’s designed for. Things begin to heat up. Luckily the circuit breaker senses this, trips and “breaks” the circuit.

A Brief Brush Up On What You Need To Know About Termites

My Pest Control Quick Tips

All About Termites: Species & Best Protection

Imagine this scenario: you suspect your home has termites, did a research and symptoms seem like termite infestation. You then made an enquiry and a termite treatment is suggested that costs heavy. After spending a few days with the arrangement and treatment, the biggest nightmare falls on you – it doesn’t seem to work!

termite damage wood frames

I notice damages on my door frames, kitchen cabinets and bedroom wardrobe — first reaction to fixtures spoilage would either go to the renovation/interior design firm or furniture retail for damaged and faulty doors and cabinets. Before you make the complaint, pause and check if it’s a result of drywood termite infestation. Drywood Termites produce moisture as they feed into your fixtures and causes deform and warping effect. This also explains why sometimes you find it difficult to open and close your door!

termite mud tubes

I see lines or tubes grown on the wall — an Ugly muddy line, which is actually mud tubes are formed on your wall or corner of skirting. It looks unsightly, and you tried scrapping them off, but only to see other parts of your wall started to have presence of these tubes as well. These are Subterranean Termites foraging tubes that are made out of wood and soil for traveling and food sourcing purposes. Taking the fast easy way out to remove these tubes visibly could potentially mean more damaging outcome in time to come.

termite damages wall paint

My wall paint seems to be peeling off with bubbling blobs — Was it the water spillage or leaking pipes that causes paint peel on your flooring or structural surfaces? What if there are no signs or water leaks? Was it a poor paint job? Subterranean Termites are capable of producing moisture as they infest on wood, and as this moisture reaches the wood surface, it causes the pain to bubble and peel. Wood consumption also thins the paint coating, and causing the peeling and damaging effect

termite swarm

There are “flying” insects or ants around my window sills and edges — Are they flies or broken wings? Confused if those are ants, flies or other flying insects? The answer is they could be swarms of Subterranean Termites that lands on your window sills as their wings start to shed. This could also mean a possibility of a termite activity. By removing these wings and swarms, does not necessarily eradicating the problem, instead contact a pest control specialist to perform proper inspection and treatment


Tips To Choose Right Termite Control Services

The expected reaction from the side of home owners when they notice termite infestation in their home is contacting a professional termite control company for assistance. The DIY pest control is not preferred in such a case as the selection of the right treatment is done on the basis of the infestation. Another reason for which you should avoid DIY techniques for termite control is that the professional companies dealing in the pest control Brisbane have the necessary tools and experience to deal with the pests, which, most probably, you may not be having.

However, when you search on the internet or explore your local market, what you find is that there are plenty of pest control companies that claim themselves to be the best in the area. You are likely to get confused that which company you should rush to. Well, here we are going to mention some tips to help you out in the selection of a right company for Brisbane termite services.

Make sure the company meets the licensing requirements

As there are so many pest control service providers in Brisbane and the surrounding areas, great chances are there that many of them have started their services on the basis of their knowledge only. So, what you need to make sure is that the company is having a license for delivering the services. Also, look for the experience they are having in the field.

Be sure that they offer an inspection

No doubt that after listening to your issue, they would tell you the treatment options but always remember the surety about the fact that which treatment would be the best needs a thorough inspection of the property. It’s OK if your service provider recommends you different options, but before choosing the one, they should be ready to inspect the property.

Inspect what services they offer

When it comes to the pest control, some agencies offer the services for all types of pest, while some specialize in the eradication of one type of pest only. It can be the termites, insects, rats and more they would be offering the services for. Thus, you must know that what services they offer and whether their services list includes the one you are looking for or not.


How To Choose a Professional Termite Company

What should I look for when choosing a professional termite pest control company?

Every professional pest control company should offer a guarantee of effective services. Before signing with a company, make sure you understand the terms and conditions and how long the guarantee is good for.

Ask around for recommendations. A good reputation is an indicator of good and dependable service.

When you have a company in mind, check with your local Department of Agriculture or Better Business Bureau to find out if they have had any substantial complaints filed against them.

Don’t underestimate the power of credentials. The company you select should be a member of your state pest control association and the NPCA (National Pest Control Association). This is good indication that the company has access to the latest pest control technologies and education.

Don’t go with the first company recommended. Obtain proposals from a minimum of 3 reputable termite control companies. A proposal is very important and should document the company’s plan for chemical treatment procedures, bait station placements, repair or wood work, copies of insecticide labels, and warranties.

Find out about liability insurance.

Thoroughly compare bids before making a decision.

Make sure that follow-up inspections are included in the contract. The extermination contract should also include annual or semi-annual follow-up inspections to make sure the home is protected on an ongoing basis

What should I know about annual termite pest control contracts?

It is a common misconception that an “annul contract” implies re-treatment by the pest control company on an annual basis. This is not how an annual contract works. Annual treatments are actually illegal under state and federal law, unless evidence of termite activity is present.

If an annual contract is written up, then the pest control company is liable for termite treatment only if you or the company can detect evidence of termite activity.

Termite treatments carry an automatic one-year guarantee in most cases, as do some homes. After one year, the contract may be renewed if deemed necessary.

On average, it costs between $75 and $200 to renew your annual contract. The exact price will depend on the size and construction of the structure.

Do I need the annual contract?

The answer to this question is a matter of preference. Some things to consider:

If you have plans to sell your house in the near future, an annual contract is a good idea. This ensures that if termites are discovered at the time of inspection, the pest control company, NOT YOU will be responsible for termite treatment.

If you plan to sell your home, find out whether the pest control company allows for the transfer of the contract to a new homeowner, or if it automatically terminates.

If you do not plan on selling anytime soon and you feel comfortable with doing home inspections yourself, you don’t need an annual contract. The day that you find evidence of termite activity, however, you will need to decide if you can handle your own termite treatments or choose a professional company at that time.

Termites are always present in nature, but that does not mean they are always attacking our homes. However, it does mean there is a chance they will attack and that every home is at risk. Bait Stations can be a great tool for self-monitoring, to lend peace of mind.

Keep in mind that performing your own soil treatment with termiticides is not a guarantee that termites will never penetrate that barrier and invade your home.


Dealing with termites

Bug busters

Termites are a destructive pest. It’s important to have regular and thorough inspections of your home to detect the early signs of termite activity and infestation. However, finding a reliable and experienced pest manager can be hard to come by, and promising credentials don’t always guarantee they are reliable. Here we’ll tell you what to ask and what to look for when it comes to termite management.

There are around 300 species of termite in Australia, but only a handful cause problems. Subterranean termites (also called white ants) cause most of the damage around the country. They feed off cellulose-containing materials like timber.

Termites can cause major structural and economic damage to homes and commercial buildings by eating the inside of the structure and leaving only a thin shell for protection from the outside environment.

How to recognise termites

Temperature and rainfall seem to have the largest impact on termite activity, followed by the house’s age. If you stumble across a termite nest on your property, don’t disturb it until you’ve determined an appropriate termite management plan with a qualified pest manager. Once disturbed, termites might abandon the area, move elsewhere and remain undetected.

The different approaches to termite management

The Building Code of Australia requires that all new homes and extensions have a termite management system in place in all areas (except Tasmania, where the termite risk is negligible). Homes built after July 1995 must have a ‘durable notice’ of treatment fixed to a prominent position in the building (near the meter box or the entrance to a crawl space),


TIPS FOR REALTORS TO RECEIVE THE BEST TERMITE INSPECTION

Over the past few years, real estate trends in Chandler, Gilbert and Mesa have shown a steady rise in the average sale prices according to online real estate authority, Trulia. This bodes well for sellers and realtors alike but before you make a listing official, there are some things to consider regarding termite inspections and reports. When should I get the termite inspection? Who is the most qualified to complete the termite report? What if the house needs termite treatment? How much is it going to cost? These are all questions we help answer below to ensure you find a pest control company that you can easily work with for all your termite needs.

FINDING A RELIABLE TERMITE CONTROL COMPANY

If you are a realtor or you’re thinking of selling your home, it is considered a best practice to disclose any termite issues or treatments that have occurred in the home. If you have never had to deal with termite infestation before consider yourself fortunate! However, just because you don’t see outward signs of termite infestation, does not mean they are not present. Lending institutions and buyers usually require a termite inspection and report to be filed before completing the escrow process. Therefore, it’s important that you find a pest control company that you trust to efficiently complete a termite inspection and submit the W.D.I.I.R. (Wood Destroying Insect Inspection Report). Learn more about the termite report and inspections in Arizona. To find a termite control company, you can easily search the website of the Better Business Bureau for the category of ‘termite control’ and it will provide a list of businesses with the number of years they have been part of the BBB, their rating and any complaints filed against them. When calling pest control companies, always be sure to ask if they offer a full guarantee on their services, a warranty on their termite treatments and if their termite inspectors or technicians are licensed.

WHEN TO GET A TERMITE INSPECTION & UNDERSTANDING THE REPORT

As mentioned above, a termite report is usually required by most lending institutions before they will complete escrow and if a buyer is paying cash, then it is still very likely that they are going to want to know the termite history of the house or any possible concerns that a termite inspector lists. Many realtors suggest that sellers get the termite inspection and report before officially putting the house on the market. That way the seller knows if they are in the clear or if they need to budget for any termite treatment or repairs. Plus, the realtor will need to negotiate in the purchase contract what the seller is responsible for.  Because the report is only as good as where the termite inspector can look and gain access (attics and crawl spaces should be viewed when accessible) there is no guarantee that termites are not present or that they won’t be in the future. Depending on findings in the termite report, there are items termed ‘Section 1’ issues or ‘Section 2’ issues. Section 1 refers to any infestation or damage in the wood while Section 2 lists any potential problem areas that could be preventatively treated to avoid termite infestation.

NEGOTIATING TERMITE TREATMENT & COSTS BETWEEN SELLER/BUYER

Different areas throughout the country may have different practices when it comes to who is responsible for paying for the termite report and any issues that are listed. There are no laws specifying which party is responsible so that is where the realtor’s expertise comes in handy. Generally in Arizona, the seller pays for the termite inspection and report plus any Section 1 issues. This means that if there is a termite infestation the seller will pay for termite treatment plus any damage, which could be fairly pricey (in the $2,000 range for treatment or much more for repairs). That leaves the buyer to pay for any preventative measures from the Section 2 findings in the termite report. This could mean localized treatment to areas of concern such as anywhere that wood touches the earth or any place that excess moisture is present making it easier for termites to invade.

As realtors, sellers or home buyers it is important to be open and honest when it comes to termite issues and treatments. Unfortunately many homes have termite issues but that means you are not alone and you shouldn’t be surprised if the house you are buying or selling needs termite treatment or repairs. Luckily, we are always here to lend a hand so don’t hesitate to call for any termite inspection or treatment needs!

Hiring A Home Remodelling For Home Repair

Tips To Find A Remodeling Contractor You’ll Love

Think, think, think. Before a major project such as redoing a kitchen, get clear about what you (and your partner, if you’re coupled) want. Consider questions like “small kitchen remodel or a complete overhaul?”, “top-of-the-line quartz countertops or easy-on-the-wallet laminate?”, and so on. Besides brainstorming ideas for the kitchen of your dreams, take into account your budget and your timeline. This will allow you to present your contractor with a reasonably organized plan.

Do your homework. Shop around to find out prices and ratings for both typical labor costs and item(s) you’re going to have installed, whether it be plumbing fixtures, flooring, or a new HVAC system. Save remodel inspirations you particularly like to a Pinterest board. Once again, you’ll be preparing yourself to discuss your wants with the contractor you eventually hire

Read contractor reviews. Look for remodeling contractors whose customers have (mostly) glowing reports. When the occasional problem is mentioned, check out how it was dealt with. An unresolved issue – or even worse, one that degenerated into a bout of online name-calling — is an obvious red flag.

Keep it legal. Protect yourself; negotiate only with remodelers who provide proof that they are licensed, bonded, and fully insured. To double check whether a contractor’s license is valid, do a quick search of your state government’s website listings

Get more than one estimate. Request multiple estimates so you can choose the remodeler with the best deal – not necessarily the lowest price, but the one that will give you the most for your money. Make sure important information such as brand names and model numbers of any materials and appliances is included


TIPS FOR CHOOSING A REMODELING CONTRACTOR

Get Recommendations

Word of mouth is the best way to find a trustworthy contractor. If you know someone who has had a good experience with one, start there. Another good source to research a contractor is Angie’s List. Does the company you’re considering hiring have negative reviews – and if so, are they valid? (There are times when a homeowner will give a company a bad review without even hiring them.) How many “A” level reviews does the company have? Has the company received the Angie’s List Super Service Award?

Look at Credentials

Once you have your recommendations, start checking them out. Visit their website or make a phone call. Make sure they have all appropriate licenses and insurance certificates as well as any designations from professional associations like the National Kitchen and Bath Association

Check References

Contact former clients to find how their project went and ask to see the finished product. Better yet, visit a current job site and see for yourself how the contractor works. Is the job site neat and safe? Are workers courteous and careful with the homeowner’s property? Remember that when you’re hiring a remodeler, you’re buying a service and not a product. Quality of service will determine the quality of the finished project. It’s a good idea to even check with your local Better Business Bureau. If you can’t find any information on them with the BBB then they are most likely complaint free.

interview Candidates

Once you have your list of candidates narrowed down, you can and should start the interview process.

Business Management

Ask the remodeler how much the project will add to the home’s value and attain additional insurance from your provider


Tips for Choosing a Remodeling Contractor

Take the time to interview each candidate. This one’s a given. Just as you’d carefully interview a babysitter for your kids or a personal assistant for your business, you should take the time to discuss your prospective contractor’s experience, work philosophy, and vision. In the initial interview, you should ask your contractor to provide you with a portfolio and list of previous clients and projects.

Examine portfolios closely. Your contractor’s portfolio should have plenty of examples of projects in your area that are similar to your own. A contractor with experience in your type of home improvement project will be able to mastermind a remodel that accommodates your needs, complies with local building codes, and anticipate any complications that might arise

Call up references and visit projects in person. While reviewing their resume is a good way to get an initial idea of your prospective contractor’s work and areas of expertise, the only way to truly get a feel for their craftsmanship and skill level is to visit their project in person. Ask your contractor to provide at least three verifiable references to past clients with projects similar to yours. Contact these references, and ask if you can do a walk-through of the remodeled area.

Ask about permitting. Whether you are installing outlets, knocking down a wall, or remodeling a bathroom, the vast majority of home improvement projects will require a permit. Your contractor should take care of the process of obtaining a permit for you, from drawing up permit-ready plans to submitting the necessary documents. Beware of contractors who try to convince you that you don’t need a permit—this is often a red flag that he or she is trying to cut corners.

Ask about staffing. If your project requires any specialty work, such as plumbing, electricity, or structural engineering, you should ask your contractor who will be in charge of these jobs, whether they are staff specialist or hired subcontractors. It is important that specialty jobs are handled by experienced professionals if you want to ensure they will be done right. For example, electrical work should be installed by a licensed electrician—not a carpenter or plumber. Your contractor should also have a foreman on-site who supervises the project and is always available to answer your questions and address your concerns


HOME REMODELING COMPANIES- TIPS TO FIND THE RIGHT ONE

Finding reputable home remodeling companies an integral part of a home remodeling project and requires a plan. After the plan, a budget is assessed and then, finding a contractor to carry out your ideas begins. When in the market for a contractor, following these tips is a great way to find good home remodeling companies

Home Remodeling Companies to Suit Your Needs

This means not signing up with the first contractor you speak with, let them earn the job with fair estimates and a desire to give you the valued home improvement project you deserve. Talk materials, time frames and get a feel of whom you want to work with and note any expertise offered. Former customers and license qualifications are important. Every state has boards that govern contractors. Make sure your hired home remodeling firm is registered with the state licensing board.

Estimates

Estimates are important in home remodeling and working with a contractor that cannot estimate cost properly can cost a fortune. The measurements of flooring plumbing and structural renovations are costly and can wreck your budget, leaving your home in shambles if you are unable to meet necessary unexpected expenditures. Working with incompetent or irresponsible home remodeling companies is unacceptable on any scale.

Jobsite Visits

Visit jobsites of home remodeling companies and see for yourself how builders operate. Interaction with workers and the ability to manage a well- organized site goes a long way in evaluating the contractor and his job. Note the work environment and care for property. Working with reputable, reliable home remodeling companies is important to the care of your property and the completion of the job.


Hiring a Qualified Contractor

Find a Good Contractor for Large Remodels

Finding a reputable contractor is important when planning any home improvement project, but when dealing with major remodels like room additions, complete renovations of older properties, or basement remodels, those who find a good contractor are likely to get better results and avoid many of the hassles that come with these jobs, too

Finding a Reputable Contractor for Smaller Projects

The quest to find a good contractor is a little easier for smaller projects. Not only will these projects be easier to handle for a greater number of companies (increasing your chances of getting someone capable), the shorter length of small projects means that anyone you hire will have to work pretty quickly to leave you disappointed. Just because finding a reputable contractor is not as difficult with smaller projects doesn’t mean that you should be any less picky with your home improvement dollar!

How to Tell If a Contractor Is Trustworthy

Once you’ve found a few prospective companies, start your research with an introductory call each, asking a series of preliminary questions about work history

In most cases, the responses you get to these three questions will give you a very good idea of which of the contractors you contacted will be the best fit, but the following questions will typically make for a good tie-breaker if you find that you have more than one forerunner

Any good contractor will be happy to answer any one of these questions, and most will appreciate dealing with a client that takes such an active interest in finding quality service. Any contractor that gives you a hard time answering a few questions, on the other hand, is probably not someone you want to trust in your home or with your hard-earned money. Remember: always consider your instincts. If your gut tells you something doesn’t mesh with the contractor, you’re probably right

Tips To Find The Best Tile Roof For Your Roof

Tile Roofing Pros and Cons – Must Read before Buying a Tile Roof

When building a new house or improving an existing property, you may be torn between the many roofing options in the market today. Tile roofing is one of the most popular options you can consider. While it comes with a higher price tag, tile roofing has proven to be an incredible investment. As they say, you get what you invest in; tiles come with amazing benefits that make it ideal for homes and commercial properties. This piece takes a look at concrete roof tiles pros and cons to help you understand more about tile roofing

Long Term Performance

Tiles have been proven to provide the best and the longest track record in terms of durability and performance. Compared to other roofing options such as shingles, tiles are engineered to ensure the best ventilation, natural water shedding and the best resistance to wear and tear elements

An array of colours, designs, and styles

Tiles come in a wide array of colours, designs, and styles. You can choose ceramic tile roof, light shades, multi coloured or settle for a black tile roof based on your personal needs. As a matter of fact, modern concrete tile innovations allow you to explore the most unique roofing designs. From the Mediterranean, historic to contemporary styles, you can find a design that defines your flair.

Aesthetically Appealing

Tiles are aesthetically appealing. This is attributed to the natural sources of the mixtures and materials used when making tiles. Some of the best sources include clay and iron oxide. These are commonly used in making concrete tiles and they not only make them beautiful but also extremely durable

Quality Protection

Tiles are naturally heavy. This is why they last for long. However, with advancements in technology, you will find lightweight tiles in the market for re-roofing and new construction projects. Therefore, they provide long-lasting protection to your roof. Compared to other roofing materials, tile roof homes are a smart choice for their durability, protection, and ease of maintenance


Pros and Cons of Tile Roofing

Tiled roofs are beautiful and durable. They are also expensive and heavy, but that is perhaps to be expected from a roofing material that can last 100 years. Traditionally, most roofing tiles were made from slate or a fired clay or terra cotta product, but today’s roofing titles are very often made from molded, tinted concrete. Roofing tiles can come in many shapes: curved, flat, fluted, or interlocking, and in many styles

Tile roofing is a great choice for roofs that experience hot weather or exposure to salt air. This is why you very often see tile roofs in the Southwest, coastal Florida, and California. They can also be ideal for climates in which infrequent rains dump large amounts of water in a short time, since many styles are excellent at shedding rainfall from cloudbursts. If you’re considering tile roofing for your home, be aware that these roofing systems are very heavy and can break under certain conditions. Roof framing needs to be very sturdy structurally in order to support the weight.

Spanish tiles are the classic Southwest roof, resembling rows of lapping waves with troughs between the rows to carry water away. They are best suited for regions where rains might be infrequent but very heavy when they do occur. Clay, terra cotta, and concrete tiles are all available in this style

Scandia tiles resemble Spanish tiles inverted so they are upside down. Visually, they give the appearance of sharp vertical ridges with wide scallop-shaped troughs. This style is common in architecture based on northern European styles.

Double Roman tiles resemble Spanish tiles, but the rows have distinct ribs that are quite visible. The water troughs are more frequent, though smaller. These tiles are often used in Mediterranean architecture. Often made of concrete, they are also available in clay and terra cotta


Tile Roofing

In some areas of the country, tile roofing is quite common. Its distinctive appearance can be seen sparsely in many regions, but in the Southwest, tile roofing is practically a part of the landscape, giving a unique and identifiable look to the area. Tile roofs are initially a lot more costly to install than asphalt shingle, metal, or wood shake roofs, but they also last much longer. Depending on the quality, a tile roof may last 50 to 70 years–or even more! When you compare that kind of longevity to the durability of some asphalt shingles (in some situations, only 10 or 15 years), it’s easy to see how an investment in tile can pay off in the long run.

Characteristics of Tile Roofing

Traditional clay tile roofs are very heavy, and sometimes require more structural reinforcement than other roofing materials. However, tile is now offered in new lightweight versions which can be used on most structures without additional reinforcement

Benefits of Tile Roofs

Aside from the obvious aesthetic appeal and incredibly long life expectancy of tile roofs, there are several other benefits of choosing this material over a less costly one. To start with, tile roofs perform better under harsh conditions than many other roofing materials. They resist damage caused by hurricanes, earthquakes, and other weather extremes better than most other options. Roof tile is also fireproof, and carries a class-A rating

Drawbacks of Tile Roofs

Obviously, the biggest drawback is its initial installation cost. When compared to asphalt shingles or even basic metal roofing, tile roofs can cost several times as much to put up. They are, however, similar in price to slate roofing–the only other kind of material that can hold up as long or surpass the life expectancy of tile. Additionally, tile roofs (and slate roofs, as well) are not only heavy, but brittle. Not only might they require added structural reinforcement to install, but when a problem does occur, they can be difficult to work on since the individual tiles can break under the weight of a worker


How to Walk on a Concrete Tile Roof Without Damaging It

Best Places to Step

Most concrete tiles are lifted a little off of your roof and sit on wood batten strips, creating a gap under the tiles for ventilation. When you walk on your roof, make sure you are walking on the reinforced part—the lower third of the visible tile.

Sure, concrete tiles are strong. But they’re not really made to be walked on. Every time you walk on the tiles, you put stress on them that can crack them or loosen them. And that can lead to missing tiles and leaks.

But sometimes you have no choice and you have to walk on the roof. In those cases, here are a few tips that minimize the chance of you breaking tiles


Reasons Homeowners Choose Tile Roofs

Tile roofs come in many styles, each with its own preferred applications and intrinsic beauty. But there’s more to them than what meets the eye: Learn about what else makes them so attractive to homeowners

Aesthetic Appeal and Versatility

Most often concrete and clay tiles often feature natural earth tones, a sand-cast or unglazed finish, and a classic curved shape, but their design isn’t limited to such Southwestern and Mediterranean hallmarks. In fact, their casting allows for many style options to suit almost any type of architecture

Durability

Clay, concrete, and slate roofs are impervious to fire and resist rot, insects, and other pests. Most tile roofing can withstand extremes of heat and cold, making it suitable for use in virtually any climate, and clay is particularly resistant to the corrosion of salt air, making it a great choice for homes situated in coastal regions near an ocean. Many types of roofing tiles also boast superior impact resistance, making this a good option for regions that experience hail or high winds

Long Lifespan

A roof constructed of concrete, clay, or slate may be the last roof you will ever need. Clay or slate tiles may last more than 100 years, while most concrete tile comes with a 50-year warranty. Slate is one of the most durable and long-lasting roofing materials, with a lifespan of 100 to 150 years or more

Savings in the Long Run

Tile roofs tend to be the most expensive upfront for both materials and labor; slate, for example, can range from $1,000 to $2,000 per square (a 10-foot-by-10-foot patch of roofing) installed and a roofing contractor who has experience working with the high-end material may also charge more. Over their long lifespan, however, concrete, clay, and slate tiles can offset their initial expense. Due to a high thermal mass, tiles do a better job of regulating the temperature of your home, thereby helping you cut down on heating and cooling bills. The durability and longevity of clay, concrete, and slate also mean that you save money by not replacing your roof multiple times over the decades. And, all of the materials used are environmentally friendly and can be easily recycled.

Tips To Learn About Electrical Installation

What you Should Know About Electrical Installations

Electrical installations can look mysterious. There are some basic requirements for electrical installation, and some things people need to know about them. Quality of workmanship, standards of performance, and possible hazards are some of the more important issues in electrical installation, and it’s worth familiarizing yourself with the basic requirements.

Electrical installations basics

New technology requires a very wide range of new electrical installations. These are very different from the old systems, particularly in communications, media systems and IT areas

Issues, problems, and hazards

Everybody’s seen old or doubtful-looking electrical installations. The rule of thumb is that the worse it looks, the less likely an electrical installation has been professionally done or serviced. These tacky-looking messes are real hazards. Electrical wiring and connections need to be done properly.

How to check out your electrical installation for quality

It’s a good idea to get your electrical contractor to do a general system audit regularly. This is also good practice administratively, as well as for quality checking

Note: Testing of electrical systems is conducted during the maintenance program, and is efficient insofar as safety checking and operational status are involved. Properly conducted maintenance will find and fix faults, but it’s not an audit process


Tips for Finding an Electrical Contractor for Your Strata Management

Finding a good electrical contractor for strata management can be a painstaking process, particularly when you really need one. The best approach is to search for a reliable local contractor with a strong emphasis on quality of service, and a good reputation. Master electricians are definitely the preferred option for strata management, because they have both the experience and the good business sense required to ensure good service.

Strata electrical contractor issues

Strata brings with it a degree of difficulty for some contractors. Modern strata units tend to have advanced systems and wiring, and a lot of t. The best electrical contractors have a very high capacity for different types of work, and usually do major building installations as well as residential work. This added capacity adds a layer of efficiency and capability that some local contractors can’t match

The quality of work issue needs to be expanded at this point: If you’ve been having trouble with substandard work by electrical contractors, the best possible remedy is to get a master electrician. Professional electricians have an extremely low opinion of any substandard wiring or shoddy installations they encounter, so if they find them, they’ll fix them before there are any problems

Good service is good business

The good professional electrical services are also good business for strata management, particularly in the long term. The top electrical contractors are also great maintenance people. They know how to ensure the proper upkeep of your systems so there are fewer problems and no expensive, repetitive “faults” which build up to big money


Things Your Electrician Wants You to Know

Almost every home uses electric service to one degree or another. And sooner or later, something is going to go wrong with your home’s electrical system. Whether you’re looking to add a light fixture or run rough electric for an addition, here are a few key facts that your electrician wishes you knew

Don’t Ignore Warning Signs

The most important thing any electrician wants you to do is to never, ever ignore the warning signs that indicate problems in your electrical system. Whether it’s a popping noise from an outlet, a light switch that runs extremely hot, or a breaker that won’t reset, when you have an electrical issue, it’s important that you take it seriously.

Understand GFCI

One of the most common service calls electricians get is about what appears to be a failure in a bathroom circuit. By code, all outlets within 6 feet of a water source are required to be protected by a ground fault circuit interrupt (GFCI). These are important safety devices that cut off power if a circuit is losing amperage, so GFCIs are most commonly seen in bathrooms and exterior outlets. The thing that your electrician wants you to remember is that a single GFCI device protects everything else “downstream” on that circuit. Because bathrooms are often not on an isolated circuit, that means a triggered GFCI will kill the power to outlets and lights that may seem unrelated. And things can be even more confusing when the GFCI is installed at the electrical breaker box itself.

Overhead Power Lines are Live!

Overhead lines are normally NOT insulated. When you see birds or squirrels on them, they are only alive because they aren’t completing a circuit by touching the ground or offering the current an easier path than following the cable itself.

Know Your DIY limits

The DIY mind-set is wonderful thing. It’s a great way to learn about your home and develop your skills and self-reliance. But, it’s just as important to know the boundaries and limitations of your skills. If you are a DIY newbie, a good rule of thumb is to only work on electrical components that are outside of the wall. As you develop your skills as an amateur electrician, you can do more advanced work, including fishing cable and adding outlets (so long as your local building department allows it). The problem arises when DIY enthusiasts who have more enthusiasm than experience tackle an electrical project, and then bury their less than perfect work behind a layer of drywall.


Tips for electrical wiring

Power Tests

Always check & test wires and devices for power inside the box you are working in to prevent electric shock before working on them. Sometimes, even if you shut off power, some wiring may be connected to another circuit & hence may still pose a threat of electric shock

Uncoil Cable

The best way to easily instal cables is to straighten them out first. Pull the cable from the centre of the coil & lift a handful of coils. Next step is to toss them across the floor as if you’re throwing a coiled rope. Once untangled, it helps in easier handling & neater storage.

Amperage Rating

Amperage Rating or Amp needs to be checked for all electrical wiring & devices. Before installing or changing wiring, one must have the appropriate amp rating for all circuits. For example, a 30-amp circuit must have a right-gauge wiring to prevent fire hazard

Grounding Wires

Grounding provides a safe path for extra electric current to pass in case of a fault or any other issue. Follow the manufacturer’s wiring diagrams & understand grounding systems.

Boxes & Clamps

You need to ensure enclosing all wiring connections in appropriate electrical boxes or clamps. Enclosures protect the connection as well as the people from accidental contacts with those connections


WHAT MAKES A GOOD ELECTRICAL INSTALLATION?

An electrical installation comprises all the fixed electrical equipment that is supplied through the electricity meter. It includes the cables that are usually hidden in the walls and ceilings, accessories (such as sockets, switches and light fittings), and the consumer unit (fusebox) that contains all the fuses, circuit-breakers and, preferably residual current devices (RCDs)*

Ensuring there are enough sockets for electrical appliances, to minimise the use of multiway socket adapters and trailing leads

Covers are in place to prevent fingers coming into contact with live parts (broken or damaged switches should be replaced without delay)

A Residual Current Device (RCD) protection is installed to provide additional protection against electric shock

Satisfactory earthing arrangements are in place to ensure that a fuse or circuit breaker can quickly clear an electrical fault before it causes an electric shock or fire

Satisfactory protective bonding arrangements are in place where required (so any electric shock risk is minimised until a fault is cleared)

Must Learn To Do Self Deep Cleaning For Your Home

Dazzling Deep Cleaning Tips And Tricks That Will Make Your Home Sparkle

Clean your blinds with a sock

Remove the dust from your window blinds using an old tube sock dipped in a mixture of one part vinegar and one part water. Twist the blinds the other direction and repeat.

Wash your bedding and mattress.

Assuming you already wash your sheets, pillowcases, and blankets regularly, now’s the time to go a bit further and wash your duvet, bedskirt, and even your mattress. (Here’s the full scoop on how to clean and store your bedding).

Use a lint roller to get the dust off lampshades.

Easy and efficient. Go a step further and clean the base of your lamp with a damp microfiber cloth.

Scrub the front of your kitchen cabinets.

Give your kitchen cabinets new life with a quick clean. Just use a fresh dish brush and soap (or go natural with one part vegetable oil and two parts baking soda) to get rid of food stains and fingerprints.

Clean your sink drain with baking soda and lemon.

The kitchen sink is one of the dirtiest areas in the entire home. To properly clean it, pour one cup of baking soda and two cups of vinegar down your drain.


How to Deep Clean Your House Fast With the Best Expert Cleaning Tips

My house was a disgusting mess.

Toys engulfed the living room floor, spaghetti clung to the wall, piles of laundry found their home spilling off the couch onto the floor, and dust bunny colonies formed in every corner.

I’m Not The Only One

On top of causing me to be short-tempered, our messy house was causing me to feel isolated, be unproductive, struggle to focus, and was triggering allergies

Your Game Plan

Your game plan includes everything from the order you’ll clean your house in, to the cleaning supplies needed and everything in between. This is a vital step in the deep cleaning process and one that should not be skipped over.

The shallow Clean.

A shallow clean is getting rid of obvious trash and out-of-place items in the rooms of your house. A deep clean will take longer the more items you have to clean around

Focusing on Zones

You’ll work through your entire house one zone at a time to ensure no nook or cranny gets missed.


Tips to Deep Clean Your House

When you walk into a home, after you notice the furniture arrangement and the decor, your other senses get to work. The floor may be free of clutter, but there are weird smells lingering around. A clean house is more than just what you see; our other senses are just as important. If you truly want a clean home, go beyond just organising your shelves and picking things off the floor.

Clean the Floors

Don’t just pick stuff up off the floor, really dive in and deep clean every surface. With tile or hardwood floors, it’s a little easier. Give it a nice scrub with a good mop, and the floors will look and smell clean. If there are any problem spots, you can usually find tough spot cleaners to dig in and get rid of any smells.

Focus on the Bathroom and Kitchen

Guests may not spend a lot of time in these areas, but the bathroom and kitchen are the areas where cleanliness most matters. When you’re doing a major cleaning session, spend extra time in these rooms. Make sure you clean behind the toilet as much as you can, and scrub the shower down even if you can’t immediately see dirt. Toilets aren’t the only thing that can hold a scent; be sure to check for mildew or mould near the shower to be safe.

Don’t Forget Dust

Dust is essentially a buildup of particles, such as dead skin, pet dander, and other nasty things. If left unchecked, dust can cause some health issues and be unsightly for guests. Plus, dust does have a smell, so it is important to get rid of it all. When you dust, make sure you don’t just skim over the areas that are visible to guests. Dust any place you suspect there could be a buildup, especially in the hidden or hard to reach spots. You don’t have to dust every time you clean, but bi-weekly is a great schedule.

Get Underneath

The empty space under your sofa and fridge can get very dirty very quickly. Cleaning underneath these areas once every few months is never a bad idea. You never know what kind of particles or food has gotten under these areas. There could be lingering smells, and you wouldn’t even notice because you’re used to it. Be thorough and check in these spaces every few weeks.


Deep Cleaning Tips Every Obsessive Clean Freak Should Know

Hang your brooms and mops instead of storing them on the floor.

Use slow cooker liners.

Make the steel plate on your iron smooth and shiny again

Remove any carpet stain (and anything off a mattress as well).

Use an iron to remove REALLY stubborn stains from carpet

Use Pledge to really clean your stainless steel

Invest in a “Purifying Light Sanitizing Cutting Board System.”


How To Deep Clean Your House

Melting snow and budding trees are right around the corner which means it’s time to start preparing for spring cleaning. But what’s the difference between this annual housekeeping event and maintaining a tidy home throughout the year? Well, routine maintenance is lighter cleaning that helps keep your house orderly week by week. A spring clean, on the other hand, is a deeper, more detailed process that sets you up for success the rest of the year.

How to Deep Clean Your House

The key to deep cleaning your house is setting a schedule. This isn’t a chore you can conquer one day after work, so plan accordingly. Make a list of each of the rooms you’ll need to deep clean and the tasks you’ll need to complete as you go. It may be best to give yourself several weekends to complete your deep cleaning; it all depends on the size of your home.

Pro Tips for Deep Cleaning Your Home

When you’re deep cleaning your house, you want to make certain you’re working from the top of the room to the bottom. That way any dust or dirt that you knock down as you clean can be vacuumed once you’ve finished in each room

Does Merry Maids Provide Deep Cleans?

Merry Maids typically conducts a detailed clean of your home that lasts several hours during your initial cleaning visit. Afterwards, Merry Maids professionals build detailed cleaning into their scheduled visits

Just looking for a fresh start so you can pick up where a professional housecleaner left off? We also offer a one-time detailed cleaning service that can get your house ready for routine maintenance.

Must Learn How To Make Home Renovation

Tips for Finding a Contractor for Your Home Remodel

Clearly Define Your Home Remodeling Project

Before you begin reaching out to contractors, know what type of work you would like performed. This may sound obvious, but many homeowners attempt to hire a single contractor to perform a wide variety of renovations — something that generally isn’t a good idea.

Ask Homeowners in Your Neighborhood

It’s always a good idea to ask others for references. You may naturally turn to friends and family members, but why not ask a few neighbors, too? Did the family down the street just replace their home’s windows? If the end result looks great, ask them who did the work and if they’re happy with the final product. Take a drive around your neighborhood and look for homes that have undergone recent upgrades. Most homeowners are happy to share their opinion of contractors, especially if they’re pleased with the project.

Look at Online Reviews

The internet has revolutionized the way consumers shop for products and services, with 81 percent of people researching online before they buy. Sites like GuildQuality provide consumers with independent, third-party reviews from real homeowners who have used a contractor’s services.

Don’t Set a Minimum (or Maximum) Number of Estimates

When you’re looking for a contractor for any type of home improvement project, one of the first things you’ll hear is “get three estimates.” The problem with limiting yourself to three is that you really can’t be sure you’re getting a good representation of the options available.

Busy Can Be a Good Sign

When you’re ready to say “go” on a home remodel, it’s easy to go with the first contractor with an opening in their schedule. After all, you’re ready to get started, and you want the job done as soon as possible. However, a contractor with a lot of time on their hands isn’t always a good sign. A reputable, experienced contractor is likely to be in high demand, which means you might have to wait a few weeks or even a couple months to get on their schedule. When you consider that you’re making a significant investment in your home, however, isn’t it worth waiting for a contractor you trust to do an exceptional job?


How to choose a home remodeling contractor

Get recommendations

The first step in finding the right home improvement contractor is to create a list of 10–15 local contractors who have the right expertise. You’ll gradually narrow down this list to the top contenders and ultimately use it to select your contractor, so it’s best to include more names than you’ll need at this point.

Compare each contractor’s portfolio

Choose a contractor who specializes in the type of remodel you need; someone who specializes in remodeling kitchens might not be ideal for your bathroom renovation. A home improvement contractor with a creative eye can also be helpful for certain projects. For instance, if you want to lay a tile entryway with a detailed mosaic or paint a room with a faux finish, you’ll need a contractor who does that type of work well.

Ask for licensing and certification

At this point, your list should have around six to eight names. One easy way to narrow it further is to ask for contractors’ licensing and certification. The specific licenses or certifications your home improvement contractor should carry will depend on the project. Since legal requirements vary by state, call the licensing division for your community to ask for specific requirements.

Check references

Now that you’ve narrowed your long list down to five or six top contenders, it’s time to start checking references. This is a common practice, so any reputable contractor will expect you to ask for a list of references.  A typical contractor reference list includes ten or more jobs with the name, address and telephone number of each customer. It helps if there are dates for each job; if dates aren’t on the list, ask for them.

Review an example of the finished project

After you’ve called your contractors’ references, cross out any contractors who received poor reviews. Then decide which of the remaining references to visit in person to see their contractor’s completed project. Choose people who seem open and forthcoming, whose projects are similar to yours and, ideally, who live close to you. It’s particularly helpful if the work was completed at least a few years ago so you can see how it has held up. Visit at least one finished project from each of your remaining top contenders.


How to Find a Reliable Home Contractor

For most homeowners, the hardest part of any home renovation project isn’t the work itself – it’s finding a competent and reliable contractor to do the job. Installing kitchen cabinets, knocking down walls or retiling floors are straightforward tasks compared with the struggle of hiring a quality contractor who will perform at a high level from start to finish.

Everyone knows stories of horrendous contractors who tore apart the kitchen and never returned or projects that ended up costing three times the contractor’s original estimate.

“Those are the nightmare kind of stories I hear all the time,” says Angie Hicks, who in 1995 started the company that would become Angie’s List, a go-to resource for reviews of contractors and other service providers.

Even with a good contractor, home renovation can be stressful, expensive and involve unpleasant surprises, such as rotted subfloors that are revealed when tile is removed or dangerous electrical wiring or leaking pipes behind walls.

Know What You Want Before You Get Estimates

First things first: “Start with a plan and some ideas,” Hicks says. “Don’t start by talking to contractors.” You’ll get a more accurate estimate if you can be specific about what you want done and the materials you would like to use to make it happen.


How to Choose a Remodeling Contractor

Ask for Referrals

Word of mouth-hands down, is the best way to find a qualified professional to tackle the job. Ask relatives, friends and neighbors whom they’ve had good experiences with. And ask what made it a positive experience, how the contractor handled problems and whether he or she would use the same contractor again.

Look at Credentials

With recommendations in hand, do some preliminary research, whether it’s with a phone call or a visit to the contractor’s website. Find out whether he or she holds all the required licenses from state and local municipalities, along with designations from any professional associations such as the National Kitchen & Bath Association, the National Association of the Remodeling Industry and the National Association of Homebuilders. Look for contractors who have invested in course work and passed rigorous tests to earn particular certifications. Be aware, however, that not all certifications are created equal. Do some homework and find out the requirements.

Interview Candidates

Narrow down the list of contenders and set up meetings. Try to keep it to three contractors, because things can get confusing beyond that. How a contractor answers questions is extremely important, but communication goes both ways. Candidates should ask plenty of questions, too.

Check References

Ask to see some of the contractors’ projects. If you approve of them, request references and call contractors’ former customers to check up on them. Ask how the contractors did at executing the projects. Were they on time and on budget? Were the customers pleased with the outcome? Was there anything that could have been done differently?

Get It in Writing

After selecting a contractor, take a look at the documents he or she has prepared. Do they look professional? Scrutinize the contract. Does it seem fair and balanced


Tips for Hiring a Home Improvement Contractor

Connect with your contractor

The right person for the job will be easy to talk to. Make sure you see eye to eye by hiring a contractor that understands your goals and has experience in the type of job you are looking for. Communication is key for all projects, so insist on regular contact by email, phone or text messages. Allow the work crew to manage their day-to-day work, but set up a weekly face-to-face update from the foreman.

Understand that price reflects quality

Ask your contractor for his or her recommendations on how the project should take place. In the long run, is it worth cutting corners for a temporary fix? The lowest bid is not always the best. Request a written description of the materials necessary for the job. A low bid may indicate that a contractor uses sub-par materials or is desperate for work. The more accurate bid is likely somewhere in the middle.

Know a contractor’s credentials

Abbreviations behind your contractor’s name can represent certifications from national trade organizations. These indicate that the company belongs to certain organizations that bind them to a strict code of ethics. Such memberships, titles and abbreviations include certified graduate remodeler (CGR), certified aging in place specialist (CAPS), local Building Industry Association membership (BIA) and National Association of Home Builders membership (NAHB).  Also, insist on hiring a licensed, bonded and insured contractor. This is a must. Otherwise, as the property owner you are liable if a member of the work crew gets injured on the job.

Get your home improvement contract in writing

Your contract should include: detailed time frames, the total cost, payment arrangements, your contractor’s license number, project description, names of parties involved and how to handle additional costs if necessary. Be cautious; if you are not given a timeline for the job to be completed, this may indicate the contractor has several current jobs and may not complete your job in a timely manner. Keep track of all-important information as well by keeping job-related documents such as contracts, payments and receipts in one place.  Record key contact information for everyone working on your project.

Be upfront about your home improvement budget

If necessary, break the project down into multiple phases. Although this may increase the total cost due to repetitious start-up expenses and inflation, it may also be a better option for you to spread out the cost over time. Homeowners can often save money by doing somel tasks on their own, such as cleaning and painting.

Recent Posts